(→Building tiers: Expanded definition) |
|||
| (40 intermediate revisions by 14 users not shown) | |||
| Line 4: | Line 4: | ||
* [https://www.conanexiles.com/blog/dev-blog-6-building-village/ Dev Blog 6: Building a village] summarizes some of the basics on this page. |
* [https://www.conanexiles.com/blog/dev-blog-6-building-village/ Dev Blog 6: Building a village] summarizes some of the basics on this page. |
||
* Explanation, guides and videos are welcome.}} |
* Explanation, guides and videos are welcome.}} |
||
| + | {{Outdated}} |
||
| − | {{Outdated|Needs updated information - suggest that this page contains too much information for a single page}} |
||
| + | <div class="toclimit-2">{{tocright}}</div> |
||
| − | '''Building''' is one of the primary parts of [[Conan Exiles]]. By chopping down trees for [[wood]] and mining [[stone]] and other precious [[resources]], you can craft the requirements to build massive multi-leveled structures composed of complex or simple snap-linked parts, from foundations |
||
| + | '''Building''' is one of the primary parts of [[{{Gamename}}]]. By chopping down trees for [[wood]] and mining [[stone]] and other precious [[resources]], you can craft the requirements to build massive multi-leveled structures composed of complex or simple snap-linked parts, from foundations |
||
to including walls, ceilings, windows, doors, pillars, gates, among many other types. |
to including walls, ceilings, windows, doors, pillars, gates, among many other types. |
||
| − | Structures you build have a load system, if you build out of the range of your foundation you will need to reinforce it to continue building, so reinforcing your buildings at the foundation is key. You can also place signs and other furniture items as you progress in levels and upgrade your [[ |
+ | Structures you build have a load system, if you build out of the range of your foundation you will need to reinforce it to continue building, so reinforcing your buildings at the foundation is key. You can also place signs and other furniture items as you progress in levels and upgrade your [[Feat]]s. Shelter is key to reducing the extremes of the sandstorm and provides security for yourself and to protect your stash. Band together with other players to build entire settlements to withstand fierce invasions! |
You can rotate building props by scrolling up or down with the mouse wheel while in placement mode. This allows you to switch through all of the available snap points. |
You can rotate building props by scrolling up or down with the mouse wheel while in placement mode. This allows you to switch through all of the available snap points. |
||
| Line 17: | Line 18: | ||
* Ownership system with foundations and buildings allow for a radius of about 100 meters claim. If you are a part of a [[Clan]] with the owner of any placed foundations, you will be able to build on their foundations. If not you will not be able to place within 100 meters of another player's foundations. |
* Ownership system with foundations and buildings allow for a radius of about 100 meters claim. If you are a part of a [[Clan]] with the owner of any placed foundations, you will be able to build on their foundations. If not you will not be able to place within 100 meters of another player's foundations. |
||
* Buildings once placed cannot be moved, but they can be manually destroyed and will give back some of the build requirement in items. There are no building width limit, but there is a limit to how high you can go. |
* Buildings once placed cannot be moved, but they can be manually destroyed and will give back some of the build requirement in items. There are no building width limit, but there is a limit to how high you can go. |
||
| + | * Work stations can be picked up, providing they are not damaged in any way. |
||
* Walls can be placed everywhere. Walls on buildings need to be connected to a foundation. |
* Walls can be placed everywhere. Walls on buildings need to be connected to a foundation. |
||
| + | * You can build fence foundations on the side of foundations to provide an additional layer of protection. |
||
| − | * Foundations will prevent the re-spawning of [[Creatures]] and [[Resources]]. Additionally, buildings use a support system that needs to be supported by columns or being connected in some way to a foundation. |
||
| + | * Foundations will prevent the re-spawning of [[Creatures]] and [[Resources]]. |
||
| − | * Equipping a [[Repair Hammer]] will show you the quality of your buildings, and will give you a chance to see the [[materials]] needed to fix. You can craft a Repair Hammer with your first building. |
||
| + | * Buildings use a support system that needs to be supported by columns or being connected in some way to a foundation. This is called stability. You cannot add to any piece that has a stability of 20 or less. |
||
| − | * Building close to a [[Thrall]] camp will stop the inhabitants spawning. Therefore recent updates to the game have prevented building too close to these camps. |
||
| + | **You can craft a Repair Hammer with your first building. Repair hammers will show the stability of any currently placed building piece. |
||
| + | **Equipping a [[Repair Hammer]] will also give you a chance to see the [[materials]] needed to repair the structure you're looking at. |
||
| + | ***Alternatively, and if not rebound, holding the {{Key|Tab}} down shows the same information. |
||
| + | * Building close to a [[Thrall]] camp will stop the inhabitants spawning. Therefore, the game prevents building too close to these camps. |
||
==Building tiers== |
==Building tiers== |
||
| Line 26: | Line 32: | ||
Buildings have 3 different Tiers of building supplies and materials. |
Buildings have 3 different Tiers of building supplies and materials. |
||
| − | : '''Tier 1 Buildings''' - [[Sandstone Foundation|Sandstone]] ([[Stone]] and [[Wood]]) - Steel Weapons, [[explosives]], or [[orbs]] to destroy. Sandstone basic building can be unlocked with the [[Apprentice Mason]] [[recipe]]. |
+ | : '''Tier 1 Buildings''' - [[Sandstone Foundation|Sandstone]] and [[Flotsam Foundation|Flotsam]] ([[Stone]] and [[Wood]]) - Steel Weapons, [[explosives]], or [[orbs]] to destroy. Sandstone basic building can be unlocked with the [[Apprentice Mason]] [[recipe]]. |
| − | : '''Tier 2 Buildings''' - [[Stonebrick Foundation|Stonebrick]] ([[Brick|Bricks]], [[Shaped Wood]], [[Iron Reinforcement]]) - Brick buildings are not able to be damaged by weapons and require the use of [[explosives]] or [[orbs]] to destroy. Bricks building can be unlocked with the [[Journeyman Mason]] [[recipe]]. |
+ | : '''Tier 2 Buildings''' - [[Stonebrick Foundation|Stonebrick]] and [[Insulated Wooden Foundation|Insulated Wood]] ([[Brick|Bricks]], [[Shaped Wood]], [[Iron Reinforcement]]) - Brick buildings are not able to be damaged by weapons and require the use of [[explosives]] or [[orbs]] to destroy. Bricks building can be unlocked with the [[Journeyman Mason]] [[recipe]]. |
| − | : '''Tier 3 Buildings''' - [[Reinforced Stone Foundation|Reinforced Stone]] ([[Hardened Brick]], [[Shaped Wood]], [[Steel Reinforcement]]s)- Steel buildings are not able to be damaged by [[Weapons]] and require the use of [[explosives]] or [[orbs]] to destroy. Unlock with the [[Master Mason]] [[recipe]]. |
+ | : '''Tier 3 Buildings''' - [[Reinforced Stone Foundation|Reinforced Stone]] and [[Black Ice-Reinforced Wooden Foundation|Black Ice-Reinforced]] ([[Hardened Brick]], [[Shaped Wood]], [[Steel Reinforcement]]s)- Steel buildings are not able to be damaged by [[Weapons]] and require the use of [[explosives]] or [[orbs]] to destroy. Unlock with the [[Master Mason]] [[recipe]]. |
| + | :: All DLC building components are Tier 3 with the exception of [[Flotsam]]. |
||
| − | ==Building |
+ | ==Environmental Building Effects== |
| + | Most building materials have an inherent resistance to heat or cold and are appropriately used in zones where protection is necessary. Having chosen where you want to build, the following table will help you decide on protection, and from that, you decide aesthetics. You may choose to select a building type that does not insulate from the existing effect and counter it in a different way, such as armor temperature characteristics, fireplaces, etc, simply for style. If you do choose that approach, be aware you run the risk of offline temperature-related deaths. [[File:T BuffIconInside.png|frameless|51px|link=]] The '''sheltered''' [[status effect]] indicates that your character has some form of cover from weather effects, reducing the impact of hot, or cold weather. Being sheltered also provides cover from the [[sandstorm]]. |
||
| − | :''Please contribute building [[guide]]s to the wiki. They are more than welcome!'' |
||
| + | <onlyinclude>{| class="wikitable sortable mw-collapsible mw-collapsed" style="text-align: left; min-width: 30%;" |
||
| − | * [https://www.youtube.com/watch?v=8nYGa5f4ITM Advanced Building Tips] |
||
| + | |+ class="infoboxname" colspan="6" | Building Insulation Types |
||
| − | |||
| + | ! Name |
||
| − | ====Staircases==== |
||
| + | ! Insulation Type |
||
| − | * [https://www.youtube.com/watch?v=XRL2lCW0hEs Round towers with spiral stairs] |
||
| + | ! Level |
||
| − | * [https://www.youtube.com/watch?v=OIbApqj85Ag Round towers with spiral stairs] (other examples) |
||
| + | ! Source |
||
| − | * [https://www.youtube.com/watch?v=t8yu_wr4_z4 Towers with external stairs] |
||
| + | |- |
||
| − | * [https://www.youtube.com/watch?v=pvi1Fhgc2lM Open air winding spiral stairs] |
||
| + | | '''Aquilonian''' |
||
| − | |||
| + | | Heat |
||
| − | ====Advanced==== |
||
| + | | T3 |
||
| − | * [https://www.youtube.com/watch?v=7ltHz2ZFchE Wall construction] |
||
| + | | [[DLC]] [[Jewel of the West Pack]] |
||
| − | * [https://www.youtube.com/watch?v=qPDoOWfqTlY Building stability] |
||
| + | |- |
||
| − | * [https://www.youtube.com/watch?v=hN_frQp9lWQ How to disable foundation snapping] |
||
| + | | '''Arena''' |
||
| − | :''See also: [https://steamcommunity.com/sharedfiles/filedetails/?id=909543602 a guide (outdated) on building and stability].'' |
||
| + | | Neutral |
||
| + | | T3 |
||
| + | | [[DLC]] [[Blood and Sand Pack]] |
||
| + | |- |
||
| + | | '''Black Ice-Reinforced Wood''' |
||
| + | | Cold |
||
| + | | T3 |
||
| + | | Base Game |
||
| + | |- |
||
| + | | '''Frontier''' |
||
| + | | Heat |
||
| + | | T3 |
||
| + | | [[DLC]] [[The Savage Frontier Pack]] |
||
| + | |- |
||
| + | | '''Insulated Wood''' |
||
| + | | Cold |
||
| + | | T2 |
||
| + | | Base Game |
||
| + | |- |
||
| + | | '''Khitan''' |
||
| + | | Cold |
||
| + | | T3 |
||
| + | | [[DLC]] [[The Imperial East Pack]] |
||
| + | |- |
||
| + | | '''Reinforced Stone''' |
||
| + | | Heat |
||
| + | | T3 |
||
| + | | Base Game |
||
| + | |- |
||
| + | | '''Sandstone''' |
||
| + | | Heat |
||
| + | | T1 |
||
| + | | Base Game |
||
| + | |- |
||
| + | | '''Stonebrick''' |
||
| + | | Heat |
||
| + | | T2 |
||
| + | | Base Game |
||
| + | |- |
||
| + | | '''Turanian''' |
||
| + | | Heat |
||
| + | | T3 |
||
| + | | [[DLC]] [[Treasures of Turan Pack]] |
||
| + | |- |
||
| + | | '''Yamatai''' |
||
| + | | Heat |
||
| + | | T3 |
||
| + | | [[DLC]] [[Seekers of the Dawn Pack]] |
||
| + | |} |
||
==Decay System== |
==Decay System== |
||
| − | {{#ev:youtube| |
+ | {{#ev:youtube|4Eh6kFTgf4A|400|right|}} |
* To prevent the map from being cluttered with buildings from players who have left the server, buildings will decay over time. |
* To prevent the map from being cluttered with buildings from players who have left the server, buildings will decay over time. |
||
| − | * Connecting more and higher-quality building materials will increase the total available decay timer, up to a maximum. To share in the decay timer, structural pieces must be connected. |
+ | * Connecting more and higher-quality building materials will increase the total available decay timer, up to a maximum of 7 days. To share in the decay timer, structural pieces must be connected. |
| + | ** A small building (especially if T1) will not get the full 7 day timer. Try placing a single isolated foundation and check the timer. It will be very low. Keep adding foundations a few at a time and checking the timer (will take a few seconds to update). You will notice the maximum timer gradually gets longer.<ref>https://forums.funcom.com/t/decay-and-abandonment/49820/4</ref> |
||
| − | * When a player or clan member who owns a structure gets near it, the decay timer will increase up to the max. |
||
| + | ** Altars provide a massive boost to decay time (both limit and time left) on smaller buildings. |
||
| − | * Equipping a repair hammer will allow a player to view the remaining decay time on a structure. |
||
| + | ** Placeables will share the timer of a nearby structure if they are within 1 meter.{{citation needed}} They do not have to be on foundations. |
||
| + | ** Even if pieces were once connected and you take the connecting foundation away, they will still share the same timer. |
||
| + | * When a player or clan member who owns a structure gets near it, the decay timer will increase up to the max. Upon walking away or logging out, the timer will start to decrease again. |
||
| + | ** Placing an explosive jar on a non-owned structure or damaging part of it will increase the decay timer to the maximum. |
||
| + | * Equipping a repair hammer or pressing {{Key|Tab}} will allow a player to view the remaining decay time on a structure. |
||
** Subtracting the current decay time remaining from the maximum decay time shows how recently the structure's owner has been in the area. If it is at the maximum, the player is home! |
** Subtracting the current decay time remaining from the maximum decay time shows how recently the structure's owner has been in the area. If it is at the maximum, the player is home! |
||
| + | * After the decay timer has elapsed (decay will read 0:00, the state listed in the event log is called "abandoned"), a 24-hour grace period will begin. During this time, any player may activate it and select "demolish" to destroy the structure for 24 hours. After 24 hours, the structure will disappear. Both only happen if a player is within render distance. |
||
| − | * Placing an explosive jar on a non-owned structure or destroying part of it will increase the decay timer to the maximum. |
||
| + | * Placeables that are mostly under the mesh will lose stability and are removed automatically after some time. This may happen to large structures like [[Animal Pen]]s.<ref>AlrenStorm (discord)</ref>. |
||
| − | * After the decay timer has elapsed, a 24-hour grace period will begin (decay will read 0:00). |
||
| + | <br/> |
||
| − | * After a structure has decayed, any player may activate it and select "demolish" to destroy the structure for 24 hours. After 24 hours, the structure will disappear. |
||
| + | |||
| − | * Placeables that are mostly under the mesh will lose stability and are removed automatically after some time. This may happen to large structures like [[Animal Pen]]s.<ref>AlrenStorm (discord)</ref> |
||
| + | :''The grace period for single building pieces which are close to each other but not connected may occasionally not trigger, unless the player re-enters render distance or a server restart is performed. This is because the timers of the individual pieces can interfere with each other. This currently seems to be a bug.'' |
||
| − | * A small building (especially if T1) will not get the full 7 day timer. |
||
| − | ** Try placing a single isolated foundation and check the timer. It will be very low. Keep adding foundations a few at a time and checking the timer (will take a few seconds to update). You will notice the maximum timer gradually gets longer.<ref>https://forums.funcom.com/t/decay-and-abandonment/49820/4</ref> |
||
==List of all buildable structures== |
==List of all buildable structures== |
||
===Sandstone=== |
===Sandstone=== |
||
{{cols|3| |
{{cols|3| |
||
| − | * |
+ | * {{ItemLink|Sandstone Foundation}} |
| − | * |
+ | * {{ItemLink|Sandstone Wall}} |
| − | * |
+ | * {{ItemLink|Sandstone Ceiling}} |
| − | * |
+ | * {{ItemLink|Sandstone Doorframe}} |
| − | * |
+ | * {{ItemLink|Simple Wooden Door}} |
| − | * |
+ | * {{ItemLink|Sandstone Pillar}} |
| − | * |
+ | * {{ItemLink|Sandstone Frame|Sandstone Window Frame}} |
| − | * |
+ | * {{ItemLink|Sandstone Wedge}} |
| − | * |
+ | * {{ItemLink|Sandstone Wedge Foundation}} |
| − | * |
+ | * {{ItemLink|Thatch Wedge Sloped Roof}} |
| − | * |
+ | * {{ItemLink|Inverted Thatch Wedge Sloped Roof}} |
| − | * |
+ | * {{ItemLink|Thatch Sloped Roof}} |
| − | * |
+ | * {{ItemLink|Left-sloping Sandstone Wall}} |
| − | * |
+ | * {{ItemLink|Right-sloping Sandstone Wall}} |
| − | * |
+ | * {{ItemLink|Thatch Sloped Roof Corner}} |
| − | * |
+ | * {{ItemLink|Inverted Thatch Sloped Roof Corner}} |
| − | * |
+ | * {{ItemLink|Left-sloping Inverted Sandstone Wall}} |
| − | * |
+ | * {{ItemLink|Right-sloping Inverted Sandstone Wall}} |
| − | * |
+ | * {{ItemLink|Sandstone Fence Foundation}} |
| − | * |
+ | * {{ItemLink|Sandstone Fence}} |
| − | * |
+ | * {{ItemLink|Sandstone Stairs}} |
| + | }} |
||
===Stonebrick=== |
===Stonebrick=== |
||
{{cols|3| |
{{cols|3| |
||
| − | * |
+ | * {{ItemLink|Left-sloping Stonebrick Wall}} |
| − | * |
+ | * {{ItemLink|Reinforced Wooden Door}} |
| − | * |
+ | * {{ItemLink|Right-sloping Stonebrick Wall}} |
| − | * |
+ | * {{ItemLink|Stonebrick Ceiling}} |
| − | * |
+ | * {{ItemLink|Stonebrick Doorframe}} |
| − | * |
+ | * {{ItemLink|Stonebrick Fence Foundation}} |
| − | * |
+ | * {{ItemLink|Stonebrick Fence}} |
| − | * |
+ | * {{ItemLink|Stonebrick Foundation}} |
| − | * |
+ | * {{ItemLink|Stonebrick Gate}} |
| − | * |
+ | * {{ItemLink|Stonebrick Gateway}} |
| − | * |
+ | * {{ItemLink|Stonebrick Pillar}} |
| − | * |
+ | * {{ItemLink|Stonebrick Stairs}} |
| − | * |
+ | * {{ItemLink|Stonebrick Wall}} |
| − | * |
+ | * {{ItemLink|Stonebrick Wedge Foundation}} |
| − | * |
+ | * {{ItemLink|Stonebrick Wedge}} |
| − | * |
+ | * {{ItemLink|Stonebrick Frame|Stonebrick Window Frame}} |
}} |
}} |
||
===Reinforced=== |
===Reinforced=== |
||
{{cols|3| |
{{cols|3| |
||
| − | * |
+ | * {{ItemLink|Reinforced Stone Foundation}} |
| − | * |
+ | * {{ItemLink|Reinforced Stone Wall}} |
| − | * |
+ | * {{ItemLink|Reinforced Stone Doorframe}} |
| − | * |
+ | * {{ItemLink|Heavy Reinforced Door (Variant A)}} |
| − | * |
+ | * {{ItemLink|Reinforced Stone Ceiling}} |
| − | * |
+ | * {{ItemLink|Reinforced Stone Stairs}} |
| − | * |
+ | * {{ItemLink|Reinforced Stone Pillar}} |
| − | * |
+ | * {{ItemLink|Reinforced Stone Wedge Foundation}} |
| − | * |
+ | * {{ItemLink|Reinforced Stone Wedge}} |
| − | * |
+ | * {{ItemLink|Reinforced Stone Frame|Reinforced Stone Window Frame}} |
| − | * |
+ | * {{ItemLink|Reinforced Stone Fence Foundation}} |
| − | * |
+ | * {{ItemLink|Reinforced Stone Fence}} |
| − | * |
+ | * {{ItemLink|Left-sloping Reinforced Stone Wall}} |
| − | * |
+ | * {{ItemLink|Right-sloping Reinforced Stone Wall}} |
| − | * |
+ | * {{ItemLink|Reinforced Stone Gateway}} |
| − | * |
+ | * {{ItemLink|Reinforced Stone Gate}} |
}} |
}} |
||
===Crafting Stations=== |
===Crafting Stations=== |
||
| + | {{cols|4| |
||
| + | * {{ItemLink|Armorer's Bench}} |
||
| + | * {{ItemLink|Artisan Table}} |
||
| + | * {{ItemLink|Beehive}} |
||
| + | * {{ItemLink|Blacksmith's Bench}} |
||
| + | * {{ItemLink|Bonfire}} |
||
| + | * {{ItemLink|Campfire}} |
||
| + | * {{ItemLink|Carpenter's Bench}} |
||
| + | * {{ItemLink|Compost Heap}} |
||
| + | * {{ItemLink|Crude Planter}} |
||
| + | * {{ItemLink|Dismantling Bench}} |
||
| + | * {{ItemLink|Dryer}} |
||
| + | * {{ItemLink|Fermentation Barrel}} |
||
| + | * {{ItemLink|Firebowl Cauldron}} |
||
| + | * {{ItemLink|Fish Trap}} |
||
| + | * {{ItemLink|Fluid Press}} |
||
| + | * {{ItemLink|Furnace}} |
||
| + | * {{ItemLink|Grinder}} |
||
| + | * {{ItemLink|Improved Armorer's Bench}} |
||
| + | * {{ItemLink|Improved Beehive}} |
||
| + | * {{ItemLink|Improved Blacksmith's Bench}} |
||
| + | * {{ItemLink|Improved Carpenter's Bench}} |
||
| + | * {{ItemLink|Improved Firebowl Cauldron}} |
||
| + | * {{ItemLink|Improved Fish Trap}} |
||
| + | * {{ItemLink|Improved Furnace}} |
||
| + | * {{ItemLink|Improved Furnace (Kiln)}} |
||
| + | * {{ItemLink|Improved Planter}} |
||
| + | * {{ItemLink|Improved Shellfish Trap}} |
||
| + | * {{ItemLink|Improved Stove}} |
||
| + | * {{ItemLink|Improved Tannery}} |
||
| + | * {{ItemLink|Large Campfire}} |
||
| + | * {{ItemLink|Planter}} |
||
| + | * {{ItemLink|Shellfish Trap}} |
||
| + | * {{ItemLink|Stove}} |
||
| + | * {{ItemLink|Tannery}} |
||
| + | * {{ItemLink|Torturer's Worktable}} |
||
| + | }} |
||
| + | |||
| + | ====Wheels of Pain==== |
||
{{cols|3| |
{{cols|3| |
||
| + | * {{ItemLink|Lesser Wheel of Pain}} |
||
| − | * [[Armorer's Bench]] |
||
| + | * {{ItemLink|Wheel of Pain}} |
||
| − | * [[Artisan's Worktable]] |
||
| + | * {{ItemLink|Greater Wheel of Pain}} |
||
| − | * [[Beehive]] |
||
| + | }} |
||
| − | * [[Blacksmith's Bench]] |
||
| + | |||
| − | * [[Bonfire]] |
||
| + | ====Animal Pen==== |
||
| − | * [[Campfire]] |
||
| + | {{cols|3| |
||
| − | * [[Carpenter's Bench]] |
||
| + | * {{ItemLink|Animal Pen}} |
||
| − | * [[Compost Heap]] |
||
| + | * {{ItemLink|Reinforced Animal Pen}} |
||
| − | * [[Crude Planter]] |
||
| + | * {{ItemLink|Armored Animal Pen}} |
||
| − | * [[Dryer]] |
||
| + | }} |
||
| − | * [[Fermentation Barrel]] |
||
| + | |||
| − | * [[Firebowl Cauldron]] |
||
| + | ===Storage=== |
||
| − | * [[Fluid Press]] |
||
| + | {{cols|3| |
||
| − | * [[Furnace]] |
||
| + | * {{ItemLink|Cupboard}} |
||
| − | * [[Grinder]] |
||
| − | * |
+ | * {{ItemLink|Improved Preservation Box}} |
| + | * {{ItemLink|Large Chest}} |
||
| − | * [[Improved Beehive]] |
||
| + | * {{ItemLink|Large Crate}} |
||
| − | * [[Improved Blacksmith's Bench]] |
||
| + | * {{ItemLink|Preservation Box}} |
||
| − | * [[Improved Firebowl Cauldron]] |
||
| + | * {{ItemLink|Shield Display Rack}} |
||
| − | * [[Improved Furnace]] |
||
| + | * {{ItemLink|Single-Slot Weapon Display Rack}} |
||
| − | * [[Improved Planter]] |
||
| + | * {{ItemLink|Small Crate (Variant A)}} |
||
| − | * [[Improved Stove]] |
||
| + | * {{ItemLink|Small Crate (Variant B)}} |
||
| − | * [[Improved Tannery]] |
||
| + | * {{ItemLink|Triple-Slot Weapon Display Rack}} |
||
| − | * [[Large Campfire]] |
||
| + | * {{ItemLink|Vault}} |
||
| − | * [[Planter]] |
||
| + | * {{ItemLink|Wooden Box}} |
||
| − | * [[Stove]] |
||
| + | }} |
||
| − | * [[Tannery]] |
||
| + | |||
| + | ===Light Sources=== |
||
| + | {{cols|4| |
||
| + | * {{ItemLink|Ancient Brazier (Variant A)}} |
||
| + | * {{ItemLink|Ancient Brazier (Variant B)}} |
||
| + | * {{ItemLink|Black Candle}} |
||
| + | * {{ItemLink|Black Candle Stub}} |
||
| + | * {{ItemLink|Bracketed Torch}} |
||
| + | * {{ItemLink|Candle Stub}} |
||
| + | * {{ItemLink|Cimmerian Brazier}} |
||
| + | * {{ItemLink|Fireplace and Hearth}} |
||
| + | * {{ItemLink|Glowing Standing Torch}} |
||
| + | * {{ItemLink|Glowing Wall Torch}} |
||
| + | * {{ItemLink|Hanging Brazier (Variant A)}} |
||
| + | * {{ItemLink|Hanging Brazier (Variant B)}} |
||
| + | * {{ItemLink|Iron Brazier}} |
||
| + | * {{ItemLink|Protected Torch}} |
||
| + | * {{ItemLink|Radium Wall Torch}} |
||
| + | * {{ItemLink|Radium Gem Standing Torch}} |
||
| + | * {{ItemLink|Standing Torch}} |
||
| + | * {{ItemLink|Stygian Brazier (Variant A)}} |
||
| + | * {{ItemLink|Stygian Brazier (Variant B)}} |
||
| + | * {{ItemLink|Stygian Tripod Brazier}} |
||
| + | * {{ItemLink|Wall Brazier}} |
||
| + | * {{ItemLink|Wall Lantern}} |
||
| + | * {{ItemLink|Witchfire Wall Torch}} |
||
| + | * {{ItemLink|Witchfire Standing Torch}} |
||
| + | * {{ItemLink|White Candle}} |
||
}} |
}} |
||
===Furniture=== |
===Furniture=== |
||
| + | ====Beds & Bedrolls==== |
||
| + | {{cols|3| |
||
| + | * {{ItemLink|Bed}} |
||
| + | * {{ItemLink|Bed - Folded}} |
||
| + | * {{ItemLink|Bed - Stygian (Variant A)}} |
||
| + | * {{ItemLink|Bed - Stygian (Variant B)}} |
||
| + | * {{ItemLink|Double Bed}} |
||
| + | * {{ItemLink|Fiber Bedroll}} |
||
| + | * {{ItemLink|Rawhide Bedroll}} |
||
| + | }} |
||
| + | |||
| + | ====Seats==== |
||
| + | {{cols|3| |
||
| + | * {{ItemLink|Chair}} |
||
| + | * {{ItemLink|Comfortable Chair}} |
||
| + | * {{ItemLink|Log Bench}} |
||
| + | * {{ItemLink|Round Stool}} |
||
| + | * {{ItemLink|Square Stool}} |
||
| + | * {{ItemLink|Stone Throne}} |
||
| + | * {{ItemLink|Throne of Skelos}} |
||
| + | * {{ItemLink|Wooden Bench}} |
||
| + | * {{ItemLink|Wooden Chair}} |
||
| + | * {{ItemLink|Woven Stool}} |
||
| + | }} |
||
| + | |||
| + | ====Musical Instruments==== |
||
| + | {{cols|3| |
||
| + | * {{ItemLink|Darfari Wind Chimes}} |
||
| + | * {{ItemLink|Drum (Variant B)}} |
||
| + | * {{ItemLink|Gong}} |
||
| + | * {{ItemLink|Horn (Variant B)}} |
||
| + | * {{ItemLink|Ivory Warhorn}} |
||
| + | * {{ItemLink|Large Darfari Wind Chimes}} |
||
| + | * {{ItemLink|Stygian Drum}} |
||
| + | }} |
||
| + | |||
| + | |||
| + | ====Decorative Planters==== |
||
| + | {{cols|3| |
||
| + | * {{ItemLink|Decorative Planter (Aloe)}} |
||
| + | * {{ItemLink|Decorative Planter (Asura's Glory)}} |
||
| + | * {{ItemLink|Decorative Planter (Black Lotus)}} |
||
| + | * {{ItemLink|Decorative Planter (Desert Bush)}} |
||
| + | * {{ItemLink|Decorative Planter (False Mandrake)}} |
||
| + | * {{ItemLink|Decorative Planter (Golden Lotus)}} |
||
| + | * {{ItemLink|Decorative Planter (Grey Lotus)}} |
||
| + | * {{ItemLink|Decorative Planter (Highland Bush)}} |
||
| + | * {{ItemLink|Decorative Planter (Hops)}} |
||
| + | * {{ItemLink|Decorative Planter (Leavening)}} |
||
| + | * {{ItemLink|Decorative Planter (Lupin)}} |
||
| + | * {{ItemLink|Decorative Planter (Midnight Blue)}} |
||
| + | * {{ItemLink|Decorative Planter (Orange Phykos)}} |
||
| + | * {{ItemLink|Decorative Planter (Purple Lotus)}} |
||
| + | * {{ItemLink|Decorative Planter (Yellow Lotus)}} |
||
| + | }} |
||
| + | |||
| + | ====Bowls, Cups, Jars, Jugs==== |
||
{{cols|4| |
{{cols|4| |
||
| + | * {{ItemLink|Cauldron}} |
||
| − | * [[Ale Keg]] |
||
| + | * {{ItemLink|Ceramic Jug}} |
||
| − | * [[Awning]] |
||
| + | * {{ItemLink|Ceramic Jar}} |
||
| − | * [[Barrel]] |
||
| + | * {{ItemLink|Crude Wooden Bowl}} |
||
| − | * [[Bed]] |
||
| + | * {{ItemLink|Decorative Bowl}} |
||
| − | * [[Bed - Folded]] |
||
| + | * {{ItemLink|Drinking Horn}} |
||
| − | * [[Bed - Stygian]] |
||
| + | * {{ItemLink|Earthenware Jug}} |
||
| − | * [[Bed - Stygian]] |
||
| + | * {{ItemLink|Flagon}} |
||
| − | * [[Black Candle]] |
||
| + | * {{ItemLink|Iron Bowl (Variant A)}} |
||
| − | * [[Black Candle Stub]] |
||
| + | * {{ItemLink|Iron Bowl (Variant B)}} |
||
| − | * [[Blue Stygian Carpet]] |
||
| + | * {{ItemLink|Iron Bowl (Variant C)}} |
||
| − | * [[Bracketed Torch]] |
||
| + | * {{ItemLink|Iron Bowl (Variant D)}} |
||
| − | * [[Candleholder]] |
||
| + | * {{ItemLink|Iron Decanter}} |
||
| − | * [[Candle Stub]] |
||
| + | * {{ItemLink|Iron Jug}} |
||
| − | * [[Carpet]] |
||
| + | * {{ItemLink|Iron Mug}} |
||
| − | * [[Cauldron]] |
||
| + | * {{ItemLink|Iron Pan}} |
||
| − | * [[Ceramic Jug]] |
||
| + | * {{ItemLink|Iron Pitcher}} |
||
| − | * [[Ceramic Jar]] |
||
| + | * {{ItemLink|Iron Plate (Variant A)}} |
||
| − | * [[Chair]] |
||
| + | * {{ItemLink|Iron Plate (Variant B)}} |
||
| − | * [[Comfortable Chair]] |
||
| + | * {{ItemLink|Iron Pot}} |
||
| − | * [[Crude Wooden Bowl]] |
||
| + | * {{ItemLink|Iron Tankard}} |
||
| − | * [[Darfari Wind Chimes]] |
||
| + | * {{ItemLink|Ivory Drinking Horn}} |
||
| − | * [[Decorative Bowl]] |
||
| + | * {{ItemLink|Large Earthenware Jug (Variant A)}} |
||
| − | * [[Double Bed]] |
||
| + | * {{ItemLink|Large Earthenware Jug (Variant B)}} |
||
| − | * [[Drum]] |
||
| − | * |
+ | * {{ItemLink|Large Earthenware Jug (Variant C)}} |
| + | * {{ItemLink|Mortarium}} |
||
| − | * [[Fiber Bedroll]] |
||
| + | * {{ItemLink|Ornate Ceramic Jug}} |
||
| − | * [[Fireplace and Hearth]] |
||
| + | * {{ItemLink|Stygian Earthenware Jug (Variant A)}} |
||
| − | * [[Giant Carpet]] |
||
| + | * {{ItemLink|Stygian Earthenware Jug (Variant B)}} |
||
| − | * [[Gong]] |
||
| + | * {{ItemLink|Stygian Earthenware Jug (Variant C)}} |
||
| − | * [[Green Stygian Carpet]] |
||
| + | * {{ItemLink|Stygian Metal Jug}} |
||
| − | * [[Hide Rug]] |
||
| + | * {{ItemLink|Stygian Plate}} |
||
| − | * [[Horn]] |
||
| + | * {{ItemLink|Tea Pot}} |
||
| − | * [[Iron Bowl]] |
||
| + | * {{ItemLink|Wooden Bowl (Variant A)}} |
||
| − | * [[Iron Brazier]] |
||
| + | * {{ItemLink|Wooden Bowl (Variant B)}} |
||
| − | * [[Iron Jug]] |
||
| + | * {{ItemLink|Wooden Bowl (Variant C)}} |
||
| − | * [[Iron Pan]] |
||
| + | * {{ItemLink|Wooden Bowl (Variant D)}} |
||
| − | * [[Iron Pot]] |
||
| − | * [[Large Banner]] |
||
| − | * [[Large Carpet]] |
||
| − | * [[Large Chest]] |
||
| − | * [[Large Darfari Wind Chimes]] |
||
| − | * [[Large Earthenware Jug]] |
||
| − | * [[Large Water Well]] |
||
| − | * [[Log Bench]] |
||
| − | * [[Medium Banner]] |
||
| − | * [[Mortarium]] |
||
| − | * [[Orange Stygian Carpet]] |
||
| − | * [[Papyrus Scroll]] |
||
| − | * [[Pillow]] |
||
| − | * [[Pillow]] |
||
| − | * [[Pillow]] |
||
| − | * [[Pillow]] |
||
| − | * [[Protected Torch]] |
||
| − | * [[Rawhide Bedroll]] |
||
| − | * [[Rock Slab]] |
||
| − | * [[Round Stool]] |
||
| − | * [[Shaleback Hatchling Decoration]] |
||
| − | * [[Shelf]] |
||
| − | * [[Small Barrel]] |
||
| − | * [[Small Banner]] |
||
| − | * [[Square Stool]] |
||
| − | * [[Standing Torch]] |
||
| − | * [[Stone Throne]] |
||
| − | * [[Stygian Brazier]] |
||
| − | * [[Stygian Drum]] |
||
| − | * [[Stygian Flag]] |
||
| − | * [[Table Round]] |
||
| − | * [[Table]] |
||
| − | * [[Tapestry]] |
||
| − | * [[Vault]] |
||
| − | * [[Wall Brazier]] |
||
| − | * [[Wall Lantern]] |
||
| − | * [[Wall Sign]] |
||
| − | * [[Wall Torch]] |
||
| − | * [[Water Well]] |
||
| − | * [[White Candle]] |
||
| − | * [[Wooden Bench]] |
||
| − | * [[Wooden Box]] |
||
| − | * [[Wooden Chair]] |
||
| − | * [[Wooden Signpost]] |
||
| − | * [[Woven Stool]] |
||
}} |
}} |
||
| − | === |
+ | ====Trophies & Taxidermy==== |
| + | {{cols|4| |
||
| − | '''[[Ymir]]''' |
||
| + | * {{ItemLink|Antelope Head Trophy}} |
||
| − | * [[Altar to Ymir|Altar of Ymir]] |
||
| + | * {{ItemLink|Bat Demon Head Trophy}} |
||
| − | * [[Blooded Altar to Ymir]] |
||
| + | * {{ItemLink|Black Bear Trophy}} |
||
| − | * [[Exalted Altar of Ymir]] |
||
| + | * {{ItemLink|Black Rhino Head Trophy}} |
||
| − | * [[Statue of Ymir]] |
||
| + | * {{ItemLink|Brown Bear Trophy}} |
||
| + | * {{ItemLink|Crocodile Head Trophy}} |
||
| + | * {{ItemLink|Deer Trophy}} |
||
| + | * {{ItemLink|Demon Spider Trophy}} |
||
| + | * {{ItemLink|Demonic Shaleback Head Trophy}} |
||
| + | * {{ItemLink|Dire Wolf Trophy}} |
||
| + | * {{ItemLink|Elk King Trophy}} |
||
| + | * {{ItemLink|Elk Trophy}} |
||
| + | * {{ItemLink|Gazelle Head Trophy}} |
||
| + | * {{ItemLink|Green Dragon Trophy}} |
||
| + | * {{ItemLink|Grey Rhino Head Trophy}} |
||
| + | * {{ItemLink|Gorilla Trophy}} |
||
| + | * {{ItemLink|Hyena Head Trophy}} |
||
| + | * {{ItemLink|Iron Plinth Display}} |
||
| + | * {{ItemLink|Jaguar Trophy}} |
||
| + | * {{ItemLink|King Rocknose Head Trophy}} |
||
| + | * {{ItemLink|Kudo Head Trophy}} |
||
| + | * {{ItemLink|Mammoth Trophy}} |
||
| + | * {{ItemLink|Mountain Goat Trophy}} |
||
| + | * {{ItemLink|Panther Trophy}} |
||
| + | * {{ItemLink|Rhino King Head Trophy}} |
||
| + | * {{ItemLink|Rocknose Head Trophy}} |
||
| + | * {{ItemLink|Red Dragon Trophy}} |
||
| + | * {{ItemLink|Sabretooth Trophy}} |
||
| + | * {{ItemLink|Salamander Trophy}} |
||
| + | * {{ItemLink|Shaleback Hatchling Decoration}} |
||
| + | * {{ItemLink|Shaleback Head Trophy}} |
||
| + | * {{ItemLink|Shaleback King Head Trophy}} |
||
| + | * {{ItemLink|Shoebill Trophy (Variant A)}} |
||
| + | * {{ItemLink|Shoebill Trophy (Variant B)}} |
||
| + | * {{ItemLink|Shoebill Trophy (Variant C)}} |
||
| + | * {{ItemLink|Skeletal Serpentman Head Trophy}} |
||
| + | * {{ItemLink|Taxidermied Bat-demon}} |
||
| + | * {{ItemLink|Taxidermied Bear}} |
||
| + | * {{ItemLink|Taxidermied Boar}} |
||
| + | * {{ItemLink|Taxidermied Crocodile}} |
||
| + | * {{ItemLink|Taxidermied Deer}} |
||
| + | * {{ItemLink|Taxidermied Elk}} |
||
| + | * {{ItemLink|Taxidermied Elk King}} |
||
| + | * {{ItemLink|Taxidermied Gazelle}} |
||
| + | * {{ItemLink|Taxidermied Gorilla}} |
||
| + | * {{ItemLink|Taxidermied Hyena}} |
||
| + | * {{ItemLink|Taxidermied Imp}} |
||
| + | * {{ItemLink|Taxidermied Jaguar}} |
||
| + | * {{ItemLink|Taxidermied Komodo}} |
||
| + | * {{ItemLink|Taxidermied Kudo}} |
||
| + | * {{ItemLink|Taxidermied Lion}} |
||
| + | * {{ItemLink|Taxidermied Mountain Goat}} |
||
| + | * {{ItemLink|Taxidermied Ostrich}} |
||
| + | * {{ItemLink|Taxidermied Panther}} |
||
| + | * {{ItemLink|Taxidermied Rocknose}} |
||
| + | * {{ItemLink|Taxidermied Sabretooth}} |
||
| + | * {{ItemLink|Taxidermied Salamander}} |
||
| + | * {{ItemLink|Taxidermied Sand Reaper}} |
||
| + | * {{ItemLink|Taxidermied Scorpion}} |
||
| + | * {{ItemLink|Taxidermied Shaleback}} |
||
| + | * {{ItemLink|Taxidermied Shoebill}} |
||
| + | * {{ItemLink|Taxidermied Spider}} |
||
| + | * {{ItemLink|Taxidermied Tiger}} |
||
| + | * {{ItemLink|Taxidermied Wolf}} |
||
| + | * {{ItemLink|Taxidermied Yeti}} |
||
| + | * {{ItemLink|Tiger Trophy}} |
||
| + | * {{ItemLink|Undead Hyena Head Trophy}} |
||
| + | * {{ItemLink|White Rhino Head Trophy}} |
||
| + | * {{ItemLink|Wild Boar Trophy}} |
||
| + | * {{ItemLink|Wolf Trophy}} |
||
| + | }} |
||
| − | ==== |
+ | ====Others==== |
| + | {{cols|4| |
||
| + | * {{ItemLink|Ale Keg}} |
||
| + | * {{ItemLink|Awning}} |
||
| + | * {{ItemLink|Barrel}} |
||
| + | * {{ItemLink|Black Hand Banner}} |
||
| + | * {{ItemLink|Blue Stygian Carpet}} |
||
| + | * {{ItemLink|Candleholder}} |
||
| + | * {{ItemLink|Cage}} |
||
| + | * {{ItemLink|Carpet}} |
||
| + | * {{ItemLink|Darfari Banner (Variant A)}} |
||
| + | * {{ItemLink|Darfari Banner (Variant B)}} |
||
| + | * {{ItemLink|Darfari Banner (Variant C)}} |
||
| + | * {{ItemLink|Darfari Banner (Variant D)}} |
||
| + | * {{ItemLink|Darfari Cage}} |
||
| + | * {{ItemLink|Decorative Grindstone}} |
||
| + | * {{ItemLink|Dogs of the Desert Banner}} |
||
| + | * {{ItemLink|Folding Screen}} |
||
| + | * {{ItemLink|Green Stygian Carpet}} |
||
| + | * {{ItemLink|Hide Rug}} |
||
| + | * {{ItemLink|Incense}} |
||
| + | * {{ItemLink|Impaled Skull (Variant A)}} |
||
| + | * {{ItemLink|Impaled Skull (Variant B)}} |
||
| + | * {{ItemLink|Impaled Skull (Variant C)}} |
||
| + | * {{ItemLink|Impaled Skull (Variant D)}} |
||
| + | * {{ItemLink|Journal (Variant B)}} |
||
| + | * {{ItemLink|Kinscourge Statue}} |
||
| + | * {{ItemLink|Large Banner}} |
||
| + | * {{ItemLink|Large Cage}} |
||
| + | * {{ItemLink|Large Carpet}} |
||
| + | * {{ItemLink|Large Red Shadecloth}} |
||
| + | * {{ItemLink|Low Wooden Table}} |
||
| + | * {{ItemLink|Medium Banner}} |
||
| + | * {{ItemLink|Note (Pinned Arrow)}} |
||
| + | * {{ItemLink|Note (Pinned Dagger)}} |
||
| + | * {{ItemLink|Note (Scrawled)}} |
||
| + | * {{ItemLink|Orange Stygian Carpet}} |
||
| + | * {{ItemLink|Painting (Variant A)}} |
||
| + | * {{ItemLink|Painting (Variant B)}} |
||
| + | * {{ItemLink|Painting (Variant C)}} |
||
| + | * {{ItemLink|Painting (Variant D)}} |
||
| + | * {{ItemLink|Painting (Variant E)}} |
||
| + | * {{ItemLink|Painting (Variant F)}} |
||
| + | * {{ItemLink|Painting (Variant G)}} |
||
| + | * {{ItemLink|Painting (Variant H)}} |
||
| + | * {{ItemLink|Painting (Variant I)}} |
||
| + | * {{ItemLink|Painting (Variant J)}} |
||
| + | * {{ItemLink|Papyrus Scroll}} |
||
| + | * {{ItemLink|Petrified Egg}} |
||
| + | * {{ItemLink|Pillow (Variant A)}} |
||
| + | * {{ItemLink|Pillow (Variant B)}} |
||
| + | * {{ItemLink|Pillow (Variant C)}} |
||
| + | * {{ItemLink|Pillow (Variant D)}} |
||
| + | * {{ItemLink|Relic Hunter Banner}} |
||
| + | * {{ItemLink|Rock Slab}} |
||
| + | * {{ItemLink|Round Stygian Table}} |
||
| + | * {{ItemLink|Serpentmen Statue (Variant A)}} |
||
| + | * {{ItemLink|Serpentmen Statue (Variant B)}} |
||
| + | * {{ItemLink|Serpentmen Statue (Variant C)}} |
||
| + | * {{ItemLink|Serpentmen Statue (Variant D)}} |
||
| + | * {{ItemLink|Serpentmen Statue (Variant E)}} |
||
| + | * {{ItemLink|Sign (Alchemist)}} |
||
| + | * {{ItemLink|Sign (Armorsmith)}} |
||
| + | * {{ItemLink|Sign (Blacksmith)}} |
||
| + | * {{ItemLink|Sign (Cook)}} |
||
| + | * {{ItemLink|Sign (Farm)}} |
||
| + | * {{ItemLink|Sign (Prison)}} |
||
| + | * {{ItemLink|Sign (Smeltery)}} |
||
| + | * {{ItemLink|Sign (Tannery)}} |
||
| + | * {{ItemLink|Sign (Tavern)}} |
||
| + | * {{ItemLink|Shelf}} |
||
| + | * {{ItemLink|Simple Tent}} |
||
| + | * {{ItemLink|Small Barrel}} |
||
| + | * {{ItemLink|Small Banner}} |
||
| + | * {{ItemLink|Small Red Shadecloth}} |
||
| + | * {{ItemLink|Standing Sign (Alchemist)}} |
||
| + | * {{ItemLink|Standing Sign (Armorsmith)}} |
||
| + | * {{ItemLink|Standing Sign (Blacksmith)}} |
||
| + | * {{ItemLink|Standing Sign (Cook)}} |
||
| + | * {{ItemLink|Standing Sign (Farm)}} |
||
| + | * {{ItemLink|Standing Sign (Prison)}} |
||
| + | * {{ItemLink|Standing Sign (Smeltery)}} |
||
| + | * {{ItemLink|Standing Sign (Tannery)}} |
||
| + | * {{ItemLink|Standing Sign (Tavern)}} |
||
| + | * {{ItemLink|Standing Waymarker, Left}} |
||
| + | * {{ItemLink|Standing Waymarker, Right}} |
||
| + | * {{ItemLink|Stygian Flag}} |
||
| + | * {{ItemLink|Stygian Table}} |
||
| + | * {{ItemLink|Table}} |
||
| + | * {{ItemLink|Table - Long}} |
||
| + | * {{ItemLink|Table - Rectangle (Variation A)}} |
||
| + | * {{ItemLink|Table - Rectangle (Variation B)}} |
||
| + | * {{ItemLink|Table - Round}} |
||
| + | * {{ItemLink|Tapestry (Variant A)}} |
||
| + | * {{ItemLink|Tapestry (Variant B)}} |
||
| + | * {{ItemLink|Vanir Totem (Variant A)}} |
||
| + | * {{ItemLink|Vanir Totem (Variant B)}} |
||
| + | * {{ItemLink|Vanir Totem (Variant C)}} |
||
| + | * {{ItemLink|Vanir Totem (Variant D)}} |
||
| + | * {{ItemLink|Wall Sign}} |
||
| + | * {{ItemLink|Waymarker, Left}} |
||
| + | * {{ItemLink|Waymarker, Right}} |
||
| + | * {{ItemLink|Wooden Signpost}} |
||
| + | }} |
||
| + | |||
| + | ===Altars=== |
||
| + | ====Derketo==== |
||
{{cols|3| |
{{cols|3| |
||
| + | * {{ItemLink|Pleasure Place of Derketo}} |
||
| − | * [[Sepulcher of Set]] |
||
| + | * {{ItemLink|Pleasure Dome of Derketo}} |
||
| − | * [[Altar of Set]] |
||
| + | * {{ItemLink|Pleasure Palace of Derketo}} |
||
| − | * [[Sanctum of Set]] |
||
| + | }} |
||
| − | * [[Set brazier]] |
||
| − | * [[Snake idol]]}} |
||
| − | ==== |
+ | ====Jhebbal Sag==== |
{{cols|3| |
{{cols|3| |
||
| + | * {{ItemLink|Bower of Jhebbal Sag}} |
||
| − | * [[Pit of Yog]] |
||
| + | * {{ItemLink|Retreat of Jhebbal Sag}} |
||
| − | * [[Rift of Yog]] |
||
| + | * {{ItemLink|Grove of Jhebbal Sag}} |
||
| − | * [[Abyss of Yog]] |
||
| − | * [[Skeletal Decoration]] |
||
}} |
}} |
||
====Mitra==== |
====Mitra==== |
||
{{cols|3| |
{{cols|3| |
||
| − | * |
+ | * {{ItemLink|Shrine of Mitra}} |
| − | * |
+ | * {{ItemLink|Sanctuary of Mitra}} |
| − | * |
+ | * {{ItemLink|Temple of Mitra}} |
| − | * |
+ | * {{ItemLink|Statue of Guidance}} |
| − | * |
+ | * {{ItemLink|Statue of Refreshment}} |
| + | }} |
||
| − | === |
+ | ====Set==== |
{{cols|3| |
{{cols|3| |
||
| + | * {{ItemLink|Sepulcher of Set}} |
||
| − | * [[Lesser Wheel of Pain]] |
||
| − | * |
+ | * {{ItemLink|Altar of Set}} |
| + | * {{ItemLink|Sanctum of Set}} |
||
| − | * [[Greater Wheel of Pain]] |
||
| + | * {{ItemLink|Set brazier}} |
||
| + | * {{ItemLink|Snake idol}} |
||
}} |
}} |
||
| − | === |
+ | ====Ymir==== |
{{cols|3| |
{{cols|3| |
||
| + | * {{ItemLink|Altar of Ymir}} |
||
| − | * [[Animal Pen]] |
||
| + | * {{ItemLink|Blooded Altar of Ymir}} |
||
| − | * [[Reinforced Animal Pen]] |
||
| + | * {{ItemLink|Exalted Altar of Ymir}} |
||
| − | * [[Armored Animal Pen]] |
||
| + | * {{ItemLink|Statue of Ymir}} |
||
}} |
}} |
||
| − | === |
+ | ====Yog==== |
{{cols|3| |
{{cols|3| |
||
| + | * {{ItemLink|Pit of Yog}} |
||
| − | * [[Antelope Head Trophy]] |
||
| + | * {{ItemLink|Rift of Yog}} |
||
| − | * [[Black Bear Trophy]] |
||
| + | * {{ItemLink|Abyss of Yog}} |
||
| − | * [[Black Rhino Head Trophy]] |
||
| + | * {{ItemLink|Skeletal Decoration}} |
||
| − | * [[Brown Bear Trophy]] |
||
| + | }} |
||
| − | * [[Crocodile Head Trophy]] |
||
| − | * [[Deer Trophy]] |
||
| − | * [[Demonic Shaleback Head Trophy]] |
||
| − | * [[Dire Wolf Trophy]] |
||
| − | * [[Elk Trophy]] |
||
| − | * [[Elk King Trophy]] |
||
| − | * [[Gazelle Head Trophy]] |
||
| − | * [[Grey Rhino Head Trophy]] |
||
| − | * [[Hyena Head Trophy]] |
||
| − | * [[King Rocknose Head Trophy]] |
||
| − | * [[Kudo Head Trophy]] |
||
| − | * [[Mammoth Trophy]] |
||
| − | * [[Mountain Goat Trophy]] |
||
| − | * [[Panther Trophy]] |
||
| − | * [[Rhino King Head Trophy]] |
||
| − | * [[Rocknose Head Trophy]] |
||
| − | * [[Red Dragon Trophy]] |
||
| − | * [[White Rhino Head Trophy]] |
||
| − | * [[Sabretooth Trophy]] |
||
| − | * [[Shaleback King Head Trophy]] |
||
| − | * [[Shaleback Head Trophy]] |
||
| − | * [[Skeletal Serpentman Head Trophy]] |
||
| − | * [[Bat Demon Head Trophy]] |
||
| − | * [[Wolf Head Trophy]] |
||
| − | * [[Wild Boar Trophy]] |
||
| − | * [[Green Dragon Trophy]] |
||
| − | * [[Undead Hyena Head Trophy]]}} |
||
===Additional=== |
===Additional=== |
||
{{cols|3| |
{{cols|3| |
||
| − | * |
+ | * {{ItemLink|Archery Target}} |
| + | * {{ItemLink|Drawbridge}} |
||
| − | * [[Explosive Jar]] |
||
| + | * {{ItemLink|Elevator Horizontal}} |
||
| − | * [[Large Water Well]] |
||
| + | * {{ItemLink|Elevator Vertical}} |
||
| − | * [[Simple Palisade]] |
||
| + | * {{ItemLink|Exploding Trap}} |
||
| − | * [[Weathered Skull]] |
||
| + | * {{ItemLink|Explosive Jar}} |
||
| − | * [[Spike]] |
||
| + | * {{ItemLink|Feed Box}} |
||
| − | * [[Wall Palisade]] |
||
| − | * |
+ | * {{ItemLink|Large Water Well}} |
| + | * {{ItemLink|Map-Room}} |
||
| − | * [[Vertical Elevator]] |
||
| + | * {{ItemLink|Simple Palisade}} |
||
| − | * [[Elevator Horizontal]] |
||
| + | * {{ItemLink|Spike}} |
||
| − | * [[Drawbridge]] |
||
| + | * {{ItemLink|Thrall Pot}} |
||
| − | * [[Fish Trap]] |
||
| − | * |
+ | * {{ItemLink|Vapor Trap}} |
| + | * {{ItemLink|Wall Palisade}} |
||
| + | * {{ItemLink|Water Well}} |
||
| + | * {{ItemLink|Weathered Skull}} |
||
| + | }} |
||
| + | |||
| + | ==Building guides== |
||
| + | :''See also: [[Guide]].'' |
||
| + | :''Feel free to contribute building [[guide]]s to the wiki. You're welcome!'' |
||
| + | |||
| + | * [https://steamcommunity.com/sharedfiles/filedetails/?id=909543602 Buildings and Structural Integrity] by Steitsch. |
||
| + | * [https://www.youtube.com/watch?v=OOiu_G6AKCc Foundation Stacking Simplified] |
||
| + | * [https://www.youtube.com/watch?v=8shS7IfRkfk&list=PLbnO8hTX9OeCKAdg3Ox4ID3NONhE9Ssxr Castle building] (playlist) |
||
| + | |||
| + | ===Defense=== |
||
| + | For defending against eg. [[Explosives]]. |
||
| + | * [https://www.youtube.com/watch?v=rZ7umWfnk1w Walls I] |
||
| + | * [https://www.youtube.com/watch?v=UjQv_6Vhx2U Walls II] |
||
| + | * [https://www.youtube.com/watch?v=Dx62Q9Bf7Eo Walls III] |
||
| + | * [https://www.youtube.com/watch?v=JYh6UYe1_pQ Doors] |
||
| + | * [https://www.youtube.com/watch?v=93nali77zyc Ceilings] |
||
| + | * [https://www.youtube.com/watch?v=kV6tW46_G4E Floors] |
||
| + | * [https://www.youtube.com/watch?v=JU97XU1rTFc Foundation stacking] |
||
| + | |||
| + | ===Staircases=== |
||
| + | * [https://www.youtube.com/watch?v=XRL2lCW0hEs Round towers with spiral stairs] |
||
| + | * [https://www.youtube.com/watch?v=OIbApqj85Ag Round towers with spiral stairs] (other examples) |
||
| + | * [https://www.youtube.com/watch?v=t8yu_wr4_z4 Towers with external stairs] |
||
| + | * [https://www.youtube.com/watch?v=pvi1Fhgc2lM Open air winding spiral stairs] |
||
| + | |||
| + | ===Advanced=== |
||
| + | * [https://www.youtube.com/watch?v=tTCKAo0a8Q8 6 Building Tips for Creative Base Designs | No Mods] |
||
| + | * [https://www.youtube.com/watch?v=8nYGa5f4ITM Advanced Building Tips] |
||
| + | * [https://www.youtube.com/watch?v=7ltHz2ZFchE Wall construction] |
||
| + | * [https://www.youtube.com/watch?v=qPDoOWfqTlY Building stability] |
||
| + | * [https://www.youtube.com/watch?v=hN_frQp9lWQ How to disable foundation snapping] |
||
| + | :''See also: [https://steamcommunity.com/sharedfiles/filedetails/?id=909543602 a guide (outdated) on building and stability].'' |
||
| + | |||
| + | ===Themed=== |
||
| + | * [https://www.youtube.com/watch?v=aG9pwA5c8EU&list=PL-lGiHRbXVRuOfNPYhmpmp3I6iSswBPWn Creative Building Showcases] Playlist (incl. modded builds & builds with no mods) |
||
| + | * [https://www.youtube.com/watch?v=IPFyMTRXJo4&list=PLbnO8hTX9OeBpRRQREWEJjx1PkSv-SayJ Immersive building] (playlist) |
||
| + | * [https://www.youtube.com/watch?v=xkVyGyAYbOE&list=PLb1BvY8uSBcdsdDdAl8Q2MR1br2Luhj4T Playlist] by Eradicati0n (includes modded builds) |
||
| − | == |
+ | ==Gallery== |
| − | <gallery> |
+ | <gallery mode="nolines" widths="200px" > |
File:New Placeables2.jpg |
File:New Placeables2.jpg |
||
File:Placeables.jpg |
File:Placeables.jpg |
||
| Line 351: | Line 682: | ||
[[Category:Buildings| ]] |
[[Category:Buildings| ]] |
||
| − | [[Category: |
+ | [[Category:{{Gamename}}]] |
| + | |||
[[pt-br:Construção]] |
[[pt-br:Construção]] |
||
[[fr:Bâtiments]] |
[[fr:Bâtiments]] |
||
Revision as of 01:29, 17 January 2021
Notes:
|
This article or section contains information that is out-of-date.
|
Building is one of the primary parts of Conan Exiles. By chopping down trees for wood and mining stone and other precious resources, you can craft the requirements to build massive multi-leveled structures composed of complex or simple snap-linked parts, from foundations to including walls, ceilings, windows, doors, pillars, gates, among many other types.
Structures you build have a load system, if you build out of the range of your foundation you will need to reinforce it to continue building, so reinforcing your buildings at the foundation is key. You can also place signs and other furniture items as you progress in levels and upgrade your Feats. Shelter is key to reducing the extremes of the sandstorm and provides security for yourself and to protect your stash. Band together with other players to build entire settlements to withstand fierce invasions!
You can rotate building props by scrolling up or down with the mouse wheel while in placement mode. This allows you to switch through all of the available snap points.
Basics
- See also: Controls.
- Ownership system with foundations and buildings allow for a radius of about 100 meters claim. If you are a part of a Clan with the owner of any placed foundations, you will be able to build on their foundations. If not you will not be able to place within 100 meters of another player's foundations.
- Buildings once placed cannot be moved, but they can be manually destroyed and will give back some of the build requirement in items. There are no building width limit, but there is a limit to how high you can go.
- Work stations can be picked up, providing they are not damaged in any way.
- Walls can be placed everywhere. Walls on buildings need to be connected to a foundation.
- You can build fence foundations on the side of foundations to provide an additional layer of protection.
- Foundations will prevent the re-spawning of Creatures and Resources.
- Buildings use a support system that needs to be supported by columns or being connected in some way to a foundation. This is called stability. You cannot add to any piece that has a stability of 20 or less.
- You can craft a Repair Hammer with your first building. Repair hammers will show the stability of any currently placed building piece.
- Equipping a Repair Hammer will also give you a chance to see the materials needed to repair the structure you're looking at.
- Alternatively, and if not rebound, holding the Tab down shows the same information.
- Building close to a Thrall camp will stop the inhabitants spawning. Therefore, the game prevents building too close to these camps.
Building tiers
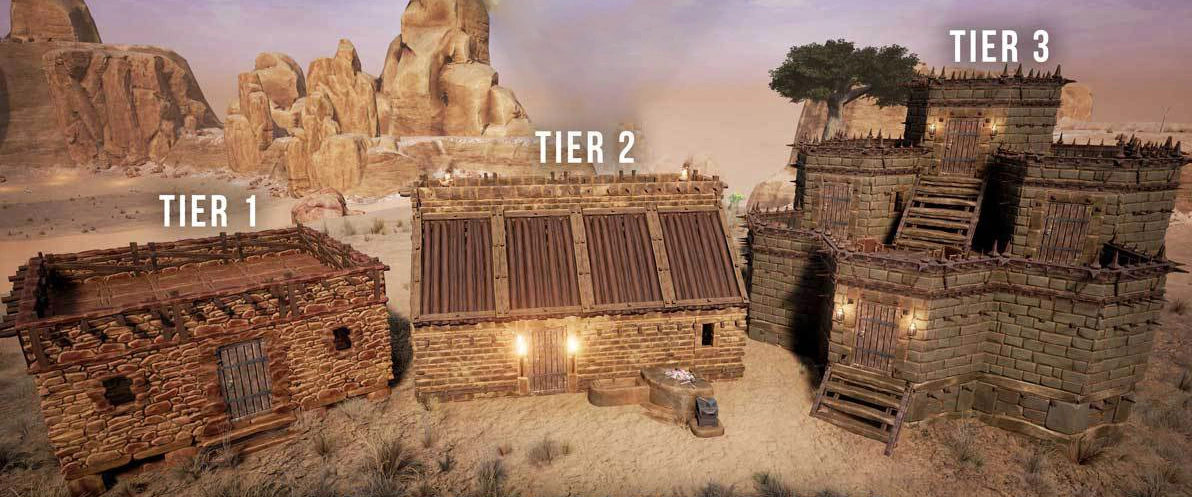
Buildings have 3 different Tiers of building supplies and materials.
- Tier 1 Buildings - Sandstone and Flotsam (Stone and Wood) - Steel Weapons, explosives, or orbs to destroy. Sandstone basic building can be unlocked with the Apprentice Mason recipe.
- Tier 2 Buildings - Stonebrick and Insulated Wood (Bricks, Shaped Wood, Iron Reinforcement) - Brick buildings are not able to be damaged by weapons and require the use of explosives or orbs to destroy. Bricks building can be unlocked with the Journeyman Mason recipe.
- Tier 3 Buildings - Reinforced Stone and Black Ice-Reinforced (Hardened Brick, Shaped Wood, Steel Reinforcements)- Steel buildings are not able to be damaged by Weapons and require the use of explosives or orbs to destroy. Unlock with the Master Mason recipe.
- All DLC building components are Tier 3 with the exception of Flotsam.
Environmental Building Effects
Most building materials have an inherent resistance to heat or cold and are appropriately used in zones where protection is necessary. Having chosen where you want to build, the following table will help you decide on protection, and from that, you decide aesthetics. You may choose to select a building type that does not insulate from the existing effect and counter it in a different way, such as armor temperature characteristics, fireplaces, etc, simply for style. If you do choose that approach, be aware you run the risk of offline temperature-related deaths.  The sheltered status effect indicates that your character has some form of cover from weather effects, reducing the impact of hot, or cold weather. Being sheltered also provides cover from the sandstorm.
| Name | Insulation Type | Level | Source |
|---|---|---|---|
| Aquilonian | Heat | T3 | DLC Jewel of the West Pack |
| Arena | Neutral | T3 | DLC Blood and Sand Pack |
| Black Ice-Reinforced Wood | Cold | T3 | Base Game |
| Frontier | Heat | T3 | DLC The Savage Frontier Pack |
| Insulated Wood | Cold | T2 | Base Game |
| Khitan | Cold | T3 | DLC The Imperial East Pack |
| Reinforced Stone | Heat | T3 | Base Game |
| Sandstone | Heat | T1 | Base Game |
| Stonebrick | Heat | T2 | Base Game |
| Turanian | Heat | T3 | DLC Treasures of Turan Pack |
| Yamatai | Heat | T3 | DLC Seekers of the Dawn Pack |
Decay System
- To prevent the map from being cluttered with buildings from players who have left the server, buildings will decay over time.
- Connecting more and higher-quality building materials will increase the total available decay timer, up to a maximum of 7 days. To share in the decay timer, structural pieces must be connected.
- A small building (especially if T1) will not get the full 7 day timer. Try placing a single isolated foundation and check the timer. It will be very low. Keep adding foundations a few at a time and checking the timer (will take a few seconds to update). You will notice the maximum timer gradually gets longer.[1]
- Altars provide a massive boost to decay time (both limit and time left) on smaller buildings.
- Placeables will share the timer of a nearby structure if they are within 1 meter.[citation needed] They do not have to be on foundations.
- Even if pieces were once connected and you take the connecting foundation away, they will still share the same timer.
- When a player or clan member who owns a structure gets near it, the decay timer will increase up to the max. Upon walking away or logging out, the timer will start to decrease again.
- Placing an explosive jar on a non-owned structure or damaging part of it will increase the decay timer to the maximum.
- Equipping a repair hammer or pressing Tab will allow a player to view the remaining decay time on a structure.
- Subtracting the current decay time remaining from the maximum decay time shows how recently the structure's owner has been in the area. If it is at the maximum, the player is home!
- After the decay timer has elapsed (decay will read 0:00, the state listed in the event log is called "abandoned"), a 24-hour grace period will begin. During this time, any player may activate it and select "demolish" to destroy the structure for 24 hours. After 24 hours, the structure will disappear. Both only happen if a player is within render distance.
- Placeables that are mostly under the mesh will lose stability and are removed automatically after some time. This may happen to large structures like Animal Pens.[2].
- The grace period for single building pieces which are close to each other but not connected may occasionally not trigger, unless the player re-enters render distance or a server restart is performed. This is because the timers of the individual pieces can interfere with each other. This currently seems to be a bug.
List of all buildable structures
Sandstone
 Sandstone Foundation
- Sandstone Wall
- Sandstone Ceiling
- Sandstone Doorframe
- Simple Wooden Door
- Sandstone Pillar
- Sandstone Window Frame
- Sandstone Wedge
- Sandstone Wedge Foundation
- Thatch Wedge Sloped Roof
- Inverted Thatch Wedge Sloped Roof
- Thatch Sloped Roof
- Left-sloping Sandstone Wall
- Right-sloping Sandstone Wall
- Thatch Sloped Roof Corner
- Inverted Thatch Sloped Roof Corner
- Left-sloping Inverted Sandstone Wall
- Right-sloping Inverted Sandstone Wall
- Sandstone Fence Foundation
- Sandstone Fence
- Sandstone Stairs
- Sandstone Foundation
- Sandstone Wall
- Sandstone Ceiling
- Sandstone Doorframe
- Simple Wooden Door
- Sandstone Pillar
- Sandstone Window Frame
- Sandstone Wedge
- Sandstone Wedge Foundation
- Thatch Wedge Sloped Roof
- Inverted Thatch Wedge Sloped Roof
- Thatch Sloped Roof
- Left-sloping Sandstone Wall
- Right-sloping Sandstone Wall
- Thatch Sloped Roof Corner
- Inverted Thatch Sloped Roof Corner
- Left-sloping Inverted Sandstone Wall
- Right-sloping Inverted Sandstone Wall
- Sandstone Fence Foundation
- Sandstone Fence
- Sandstone Stairs
Stonebrick
- Left-sloping Stonebrick Wall
- Reinforced Wooden Door
- Right-sloping Stonebrick Wall
- Stonebrick Ceiling
- Stonebrick Doorframe
- Stonebrick Fence Foundation
- Stonebrick Fence
- Stonebrick Foundation
- Stonebrick Gate
- Stonebrick Gateway
- Stonebrick Pillar
- Stonebrick Stairs
- Stonebrick Wall
- Stonebrick Wedge Foundation
- Stonebrick Wedge
- Stonebrick Window Frame
Reinforced
- Reinforced Stone Foundation
- Reinforced Stone Wall
- Reinforced Stone Doorframe
- Heavy Reinforced Door (Variant A)
- Reinforced Stone Ceiling
- Reinforced Stone Stairs
- Reinforced Stone Pillar
- Reinforced Stone Wedge Foundation
- Reinforced Stone Wedge
- Reinforced Stone Window Frame
- Reinforced Stone Fence Foundation
- Reinforced Stone Fence
- Left-sloping Reinforced Stone Wall
- Right-sloping Reinforced Stone Wall
- Reinforced Stone Gateway
- Reinforced Stone Gate
Crafting Stations
- Armorer's Bench
- Artisan Table
- Beehive
- Blacksmith's Bench
- Bonfire
- Campfire
- Carpenter's Bench
- Compost Heap
- Crude Planter
- Dismantling Bench
- Dryer
- Fermentation Barrel
- Firebowl Cauldron
- Fish Trap
- Fluid Press
- Furnace
- Grinder
- Improved Armorer's Bench
- Improved Beehive
- Improved Blacksmith's Bench
- Improved Carpenter's Bench
- Improved Firebowl Cauldron
- Improved Fish Trap
- Improved Furnace
- Improved Furnace (Kiln)
- Improved Planter
- Improved Shellfish Trap
- Improved Stove
- Improved Tannery
- Large Campfire
- Planter
- Shellfish Trap
- Stove
- Tannery
- Torturer's Worktable
Wheels of Pain
Animal Pen
Storage
Light Sources
- Ancient Brazier (Variant A)
- Ancient Brazier (Variant B)
- Black Candle
- Black Candle Stub
- Bracketed Torch
- Candle Stub
- Cimmerian Brazier
- Fireplace and Hearth
- Glowing Standing Torch
- Glowing Wall Torch
- Hanging Brazier (Variant A)
- Hanging Brazier (Variant B)
- Iron Brazier
- Protected Torch
- Radium Wall Torch
- Radium Gem Standing Torch
- Standing Torch
- Stygian Brazier (Variant A)
- Stygian Brazier (Variant B)
- Stygian Tripod Brazier
- Wall Brazier
- Wall Lantern
- Witchfire Wall Torch
- Witchfire Standing Torch
- White Candle
Furniture
Beds & Bedrolls
Seats
Musical Instruments
Decorative Planters
- Decorative Planter (Aloe)
- Decorative Planter (Asura's Glory)
- Decorative Planter (Black Lotus)
- Decorative Planter (Desert Bush)
- Decorative Planter (False Mandrake)
- Decorative Planter (Golden Lotus)
- Decorative Planter (Grey Lotus)
- Decorative Planter (Highland Bush)
- Decorative Planter (Hops)
- Decorative Planter (Leavening)
- Decorative Planter (Lupin)
- Decorative Planter (Midnight Blue)
- Decorative Planter (Orange Phykos)
- Decorative Planter (Purple Lotus)
- Decorative Planter (Yellow Lotus)
Bowls, Cups, Jars, Jugs
- Cauldron
- Ceramic Jug
- Ceramic Jar
- Crude Wooden Bowl
- Decorative Bowl
- Drinking Horn
- Earthenware Jug
- Flagon
- Iron Bowl (Variant A)
- Iron Bowl (Variant B)
- Iron Bowl (Variant C)
- Iron Bowl (Variant D)
- Iron Decanter
- Iron Jug
- Iron Mug
- Iron Pan
- Iron Pitcher
- Iron Plate (Variant A)
- Iron Plate (Variant B)
- Iron Pot
- Iron Tankard
- Ivory Drinking Horn
- Large Earthenware Jug (Variant A)
- Large Earthenware Jug (Variant B)
- Large Earthenware Jug (Variant C)
- Mortarium
- Ornate Ceramic Jug
- Stygian Earthenware Jug (Variant A)
- Stygian Earthenware Jug (Variant B)
- Stygian Earthenware Jug (Variant C)
- Stygian Metal Jug
- Stygian Plate
- Tea Pot
- Wooden Bowl (Variant A)
- Wooden Bowl (Variant B)
- Wooden Bowl (Variant C)
- Wooden Bowl (Variant D)
Trophies & Taxidermy
- Antelope Head Trophy
- Bat Demon Head Trophy
- Black Bear Trophy
- Black Rhino Head Trophy
- Brown Bear Trophy
- Crocodile Head Trophy
- Deer Trophy
- Demon Spider Trophy
- Demonic Shaleback Head Trophy
- Dire Wolf Trophy
- Elk King Trophy
- Elk Trophy
- Gazelle Head Trophy
- Green Dragon Trophy
- Grey Rhino Head Trophy
- Gorilla Trophy
- Hyena Head Trophy
- Iron Plinth Display
- Jaguar Trophy
- King Rocknose Head Trophy
- Kudo Head Trophy
- Mammoth Trophy
- Mountain Goat Trophy
- Panther Trophy
- Rhino King Head Trophy
- Rocknose Head Trophy
- Red Dragon Trophy
- Sabretooth Trophy
- Salamander Trophy
- Shaleback Hatchling Decoration
- Shaleback Head Trophy
- Shaleback King Head Trophy
- Shoebill Trophy (Variant A)
- Shoebill Trophy (Variant B)
- Shoebill Trophy (Variant C)
- Skeletal Serpentman Head Trophy
- Taxidermied Bat-demon
- Taxidermied Bear
- Taxidermied Boar
- Taxidermied Crocodile
- Taxidermied Deer
- Taxidermied Elk
- Taxidermied Elk King
- Taxidermied Gazelle
- Taxidermied Gorilla
- Taxidermied Hyena
- Taxidermied Imp
- Taxidermied Jaguar
- Taxidermied Komodo
- Taxidermied Kudo
- Taxidermied Lion
- Taxidermied Mountain Goat
- Taxidermied Ostrich
- Taxidermied Panther
- Taxidermied Rocknose
- Taxidermied Sabretooth
- Taxidermied Salamander
- Taxidermied Sand Reaper
- Taxidermied Scorpion
- Taxidermied Shaleback
- Taxidermied Shoebill
- Taxidermied Spider
- Taxidermied Tiger
- Taxidermied Wolf
- Taxidermied Yeti
- Tiger Trophy
- Undead Hyena Head Trophy
- White Rhino Head Trophy
- Wild Boar Trophy
- Wolf Trophy
Others
- Ale Keg
- Awning
- Barrel
- Black Hand Banner
- Blue Stygian Carpet
- Candleholder
- Cage
- Carpet
- Darfari Banner (Variant A)
- Darfari Banner (Variant B)
- Darfari Banner (Variant C)
- Darfari Banner (Variant D)
- Darfari Cage
- Decorative Grindstone
- Dogs of the Desert Banner
- Folding Screen
- Green Stygian Carpet
- Hide Rug
- Incense
- Impaled Skull (Variant A)
- Impaled Skull (Variant B)
- Impaled Skull (Variant C)
- Impaled Skull (Variant D)
- Journal (Variant B)
- Kinscourge Statue
- Large Banner
- Large Cage
- Large Carpet
- Large Red Shadecloth
- Low Wooden Table
- Medium Banner
- Note (Pinned Arrow)
- Note (Pinned Dagger)
- Note (Scrawled)
- Orange Stygian Carpet
- Painting (Variant A)
- Painting (Variant B)
- Painting (Variant C)
- Painting (Variant D)
- Painting (Variant E)
- Painting (Variant F)
- Painting (Variant G)
- Painting (Variant H)
- Painting (Variant I)
- Painting (Variant J)
- Papyrus Scroll
- Petrified Egg
- Pillow (Variant A)
- Pillow (Variant B)
- Pillow (Variant C)
- Pillow (Variant D)
- Relic Hunter Banner
- Rock Slab
- Round Stygian Table
- Serpentmen Statue (Variant A)
- Serpentmen Statue (Variant B)
- Serpentmen Statue (Variant C)
- Serpentmen Statue (Variant D)
- Serpentmen Statue (Variant E)
- Sign (Alchemist)
- Sign (Armorsmith)
- Sign (Blacksmith)
- Sign (Cook)
- Sign (Farm)
- Sign (Prison)
- Sign (Smeltery)
- Sign (Tannery)
- Sign (Tavern)
- Shelf
- Simple Tent
- Small Barrel
- Small Banner
- Small Red Shadecloth
- Standing Sign (Alchemist)
- Standing Sign (Armorsmith)
- Standing Sign (Blacksmith)
- Standing Sign (Cook)
- Standing Sign (Farm)
- Standing Sign (Prison)
- Standing Sign (Smeltery)
- Standing Sign (Tannery)
- Standing Sign (Tavern)
- Standing Waymarker, Left
- Standing Waymarker, Right
- Stygian Flag
- Stygian Table
- Table
- Table - Long
- Table - Rectangle (Variation A)
- Table - Rectangle (Variation B)
- Table - Round
- Tapestry (Variant A)
- Tapestry (Variant B)
- Vanir Totem (Variant A)
- Vanir Totem (Variant B)
- Vanir Totem (Variant C)
- Vanir Totem (Variant D)
- Wall Sign
- Waymarker, Left
- Waymarker, Right
- Wooden Signpost
Altars
Derketo
Jhebbal Sag
Mitra
Set
Ymir
Yog
Additional
Building guides
- Buildings and Structural Integrity by Steitsch.
- Foundation Stacking Simplified
- Castle building (playlist)
Defense
For defending against eg. Explosives.
Staircases
- Round towers with spiral stairs
- Round towers with spiral stairs (other examples)
- Towers with external stairs
- Open air winding spiral stairs
Advanced
- 6 Building Tips for Creative Base Designs | No Mods
- Advanced Building Tips
- Wall construction
- Building stability
- How to disable foundation snapping
- See also: a guide (outdated) on building and stability.
Themed
- Creative Building Showcases Playlist (incl. modded builds & builds with no mods)
- Immersive building (playlist)
- Playlist by Eradicati0n (includes modded builds)
Gallery
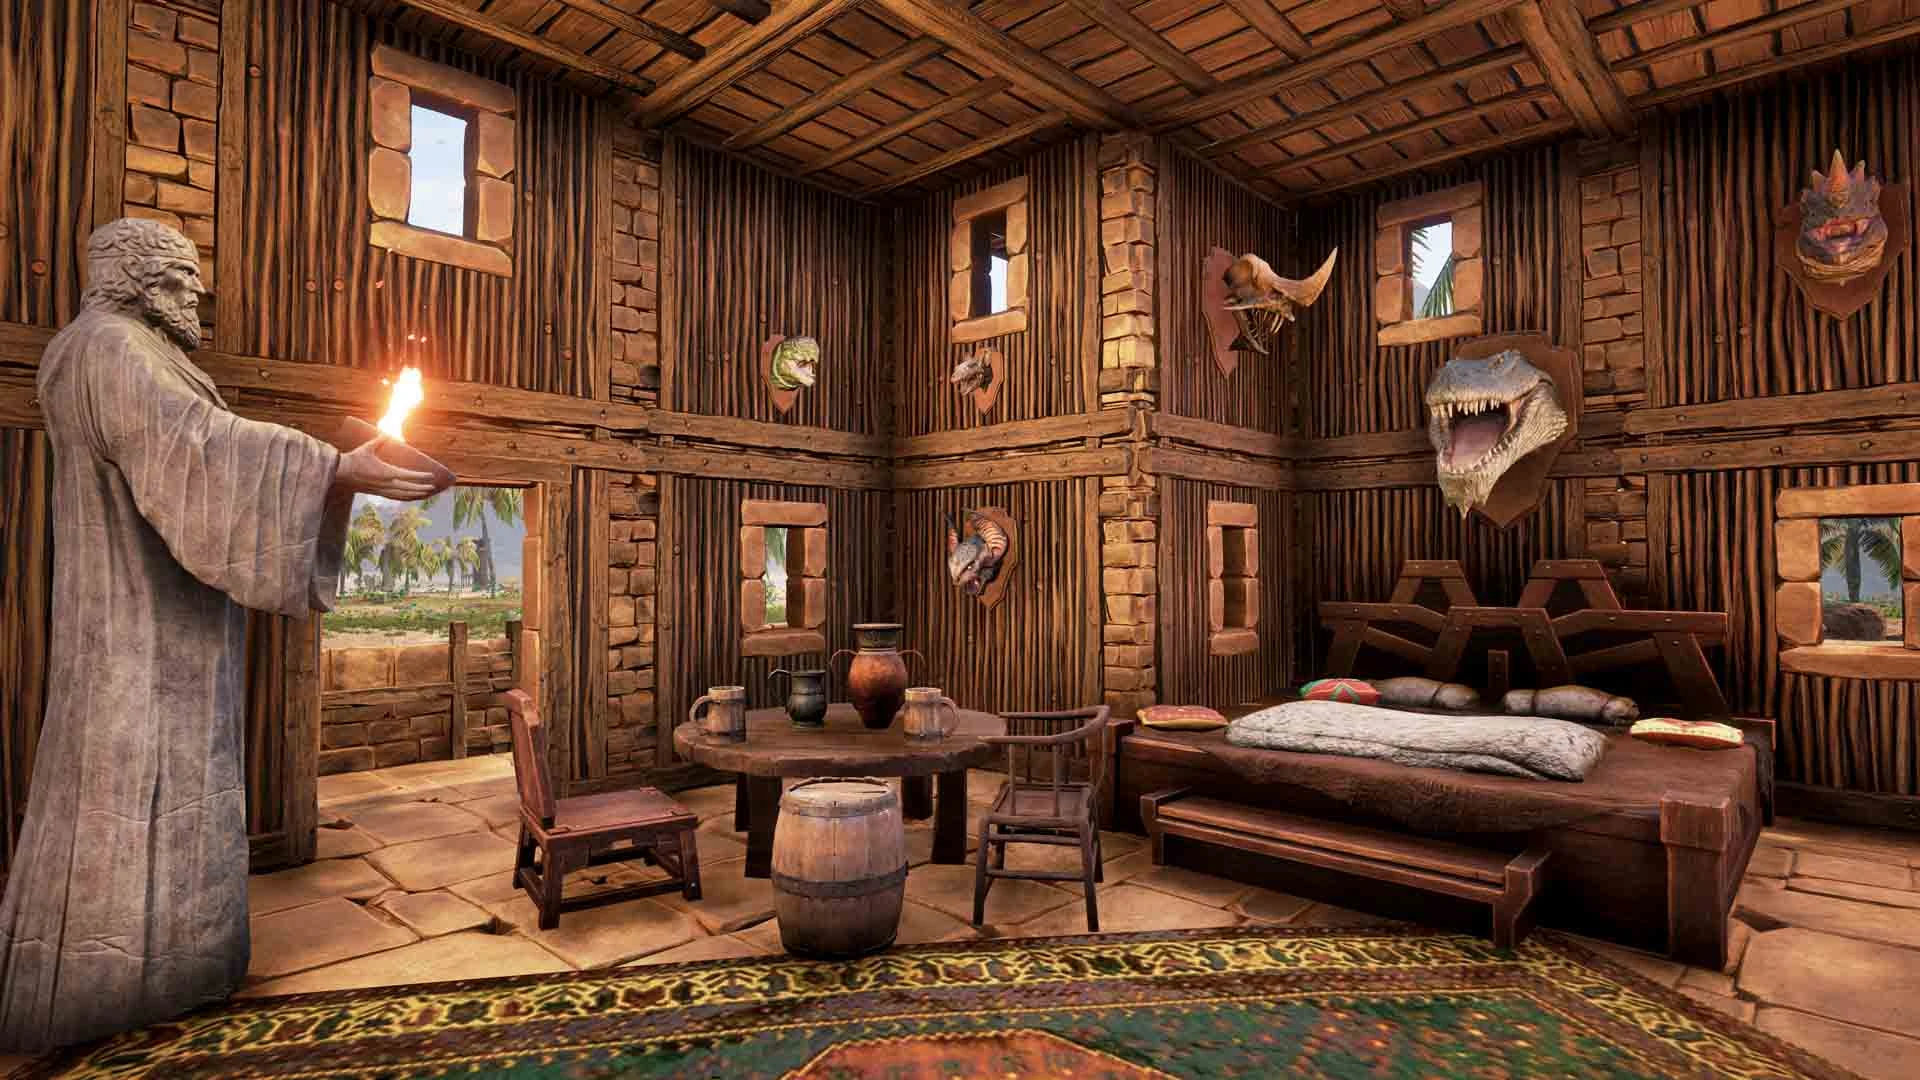
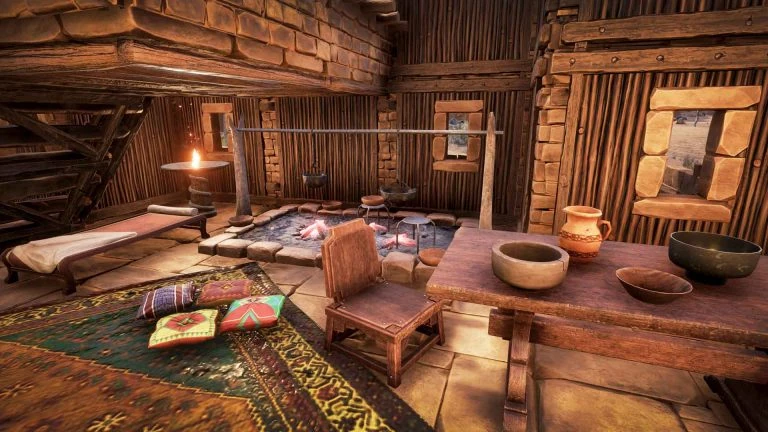
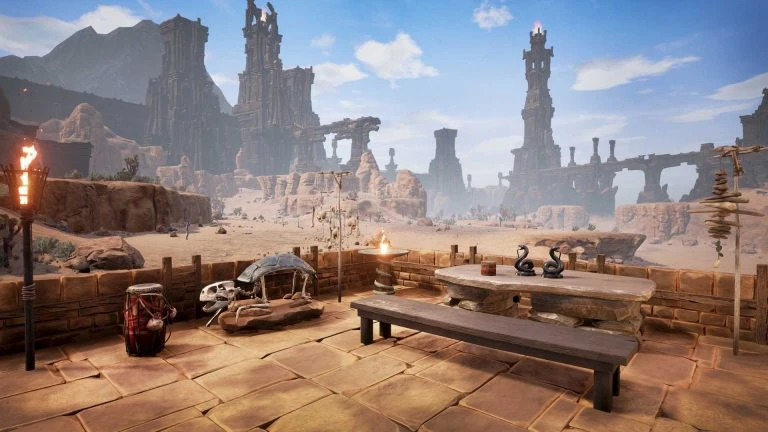
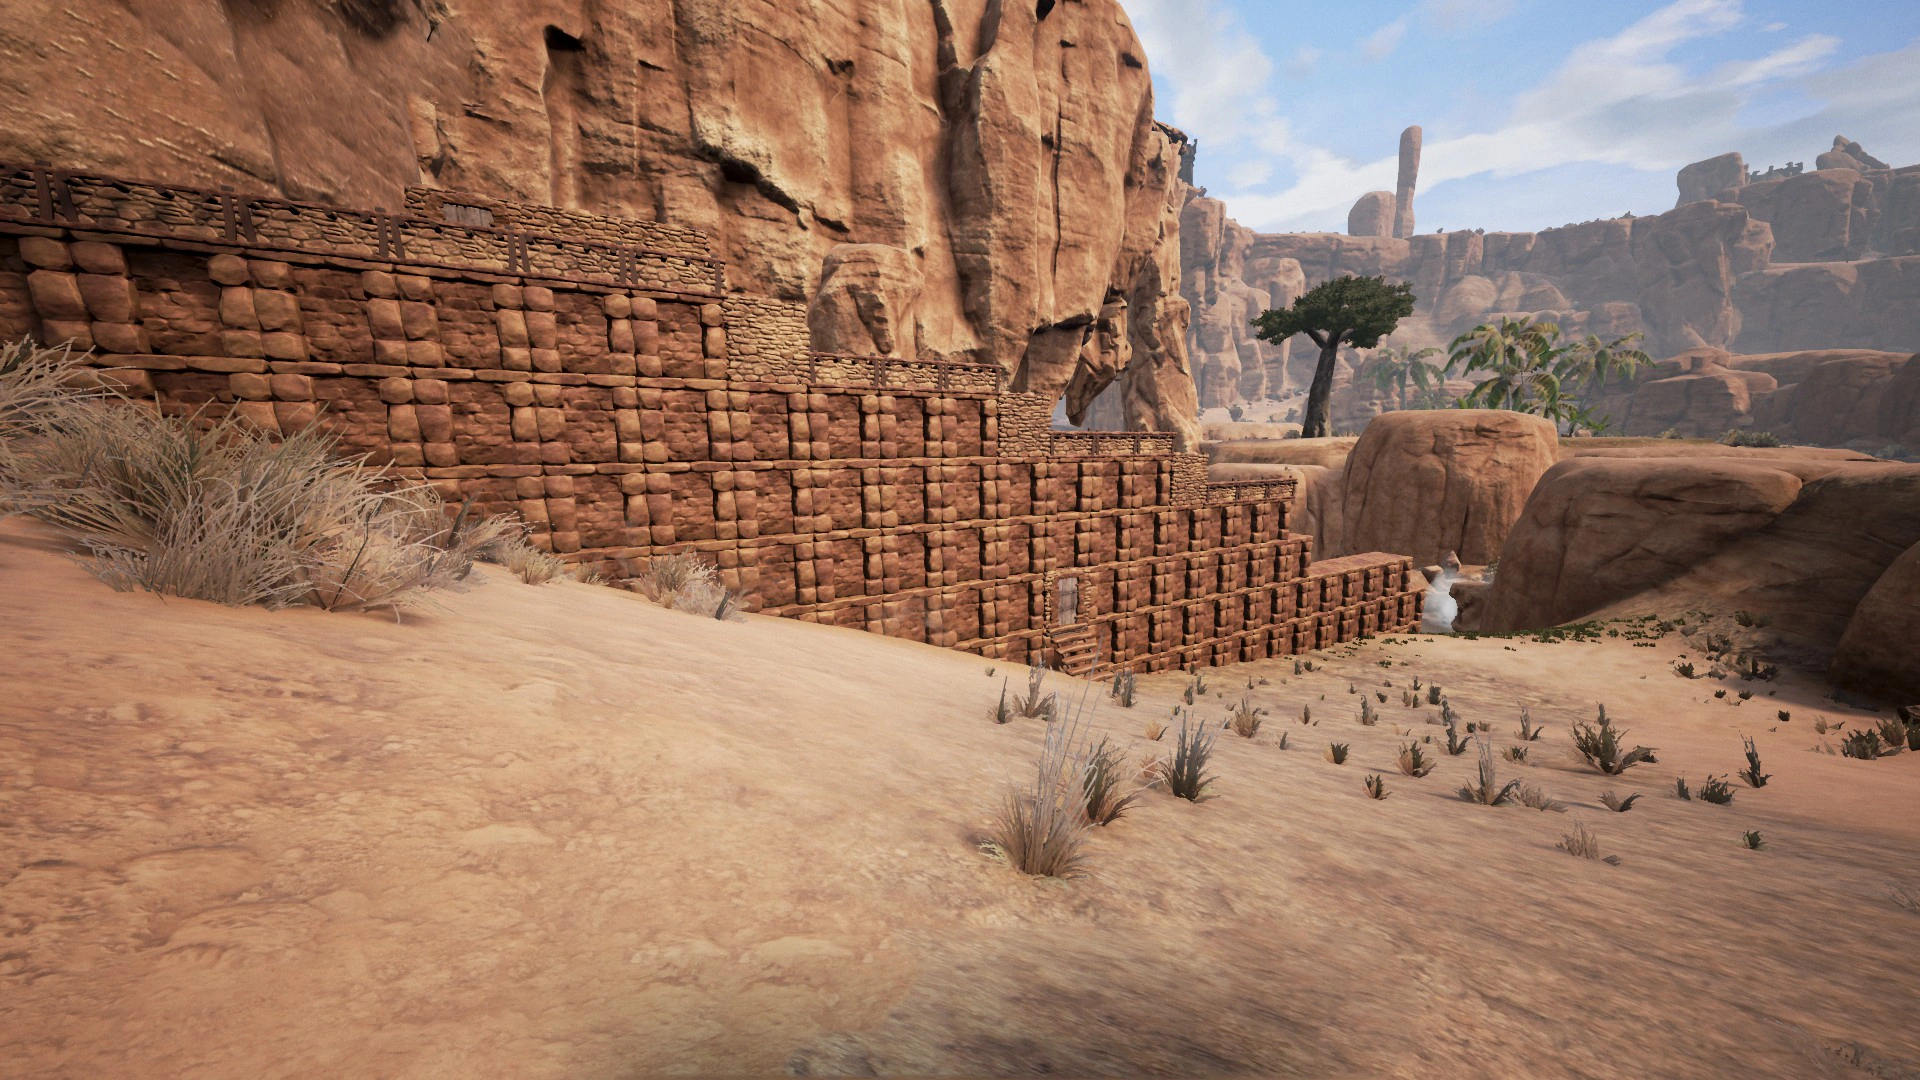
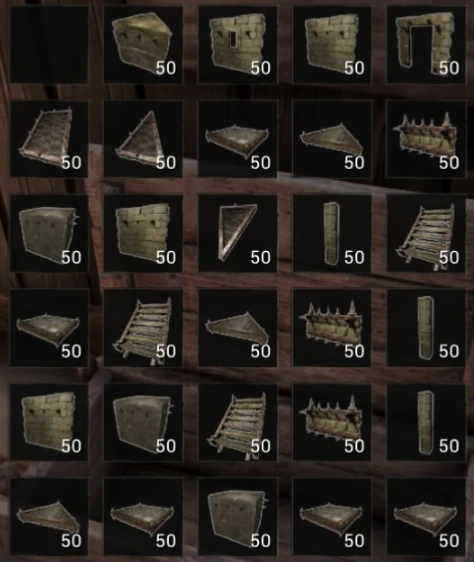
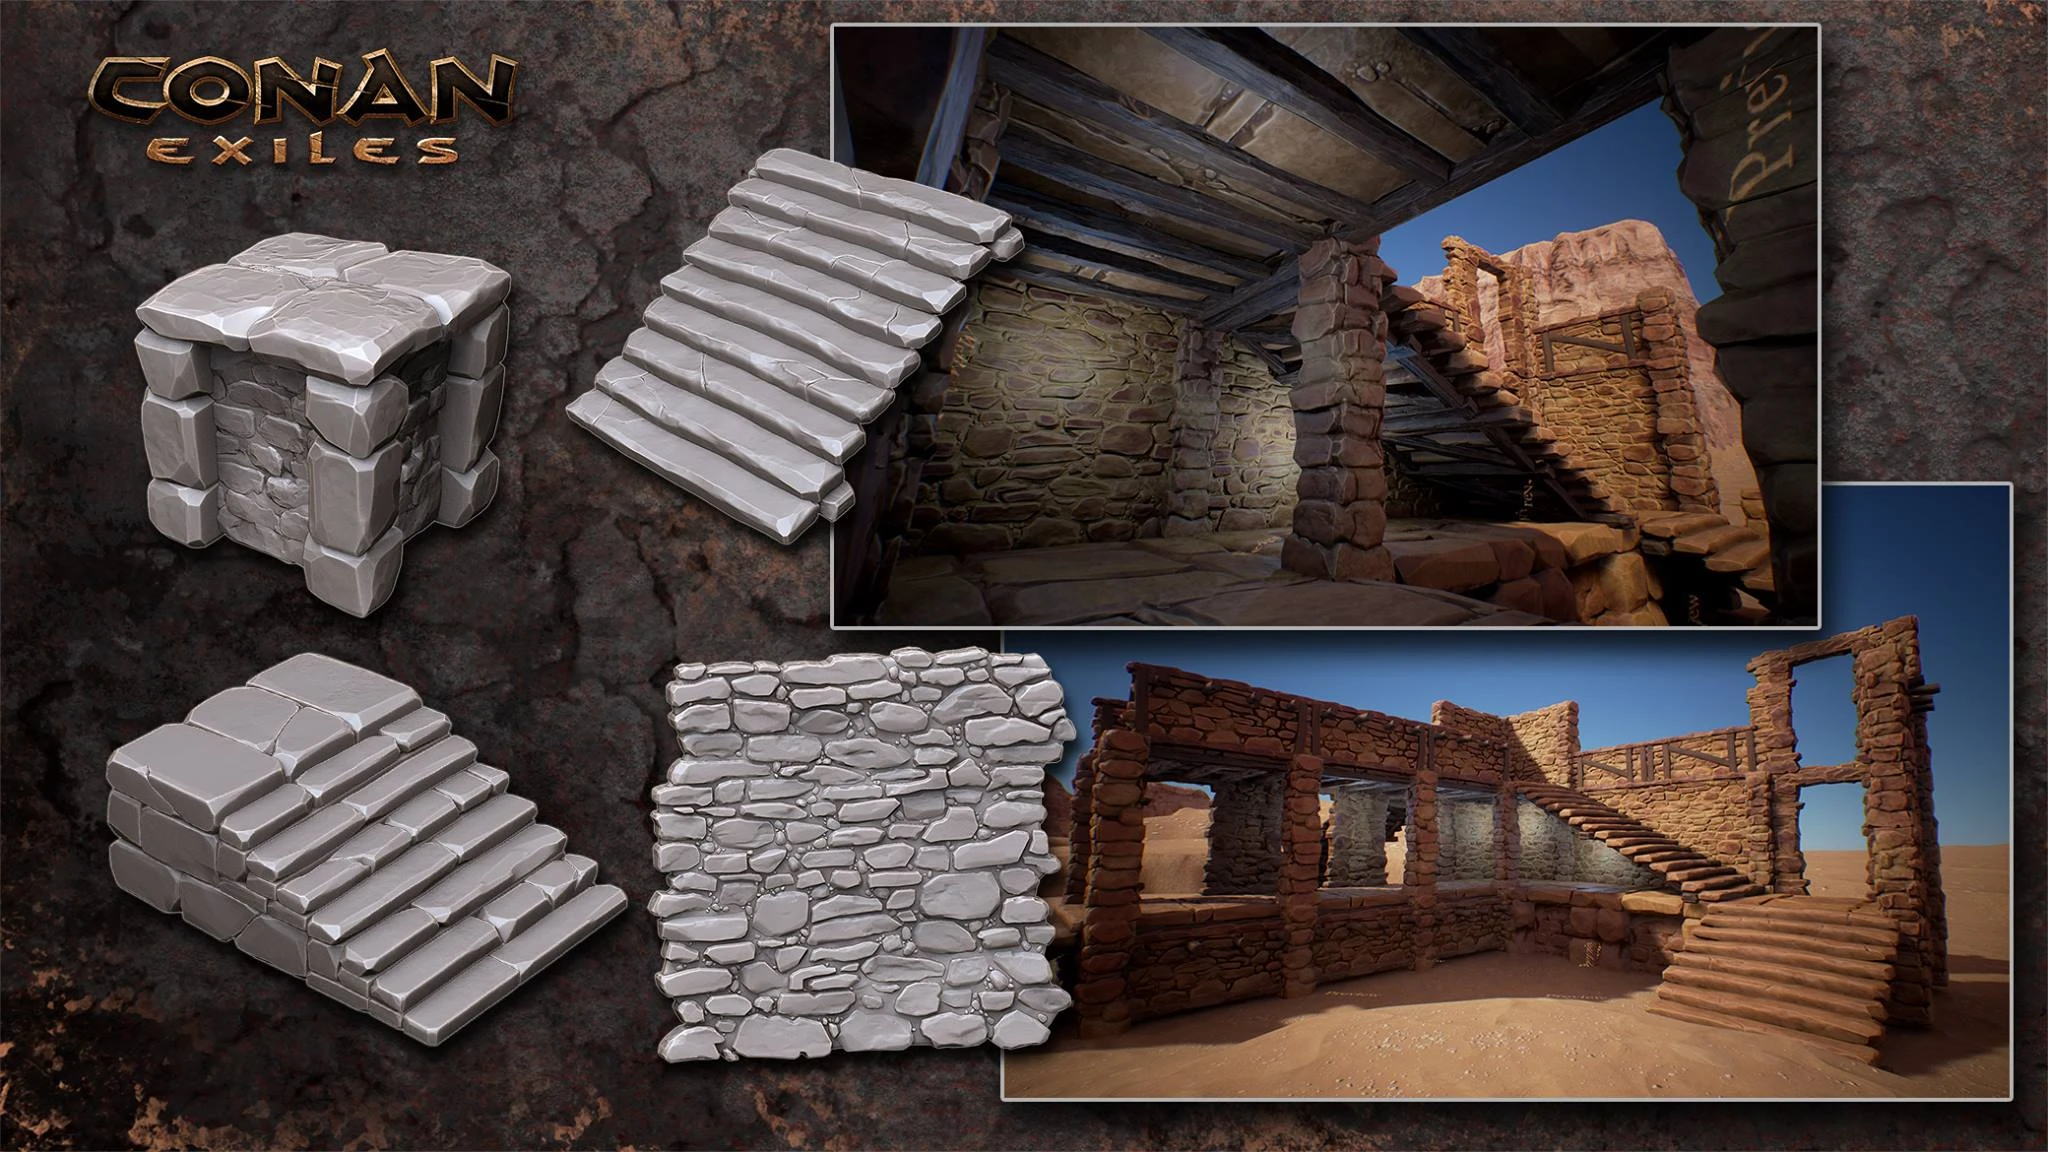
References
- ↑ https://forums.funcom.com/t/decay-and-abandonment/49820/4
- ↑ AlrenStorm (discord)