Thralls are NPCs in Conan Exiles. They can be used as servants, either working at crafting stations, as companions following the player or as lookouts guarding buildings.
Races
As is the case with characters in Conan Exiles, Thralls are also of various races.
Factions
The following is a list of Factions that it is possible to capture Thralls from:
- Accursed
- Black Hand
- Black Ring
- Darfari Cannibals
- Dogs of the Desert
- Followers of Jhebbal Sag (Midnight Grove)
- Sennu's Wolves (not implemented)
- Claw of Jhebbal Sag
- Exiles
- Forgotten Tribe
- Frost Giants - "Ymir's Children"
- Giant-kings
- Heirs of the North
- Lemurians
- Relic Hunters
- Slavetakers
- Relic Hunter Treasure Seekers
- Bandits: Thug, Prowler, Plunderer, Bandit Leader
- Prisoner, Commoner
- Relic Hunter Tomb Raiders (Wine Cellar)
- Serpentmen
- Silent Legion
- Stygian Raiders
- Votaries of Skelos
- Zingaran Freebooters
Capturing
Thralls are captured by knocking them out with one of the following items, by depleting the thin white bar above their health:
 Truncheon
- Lovetap - has the attack combos of a Mace
- Iron Truncheon
- Steel Truncheon
- Reinforced Steel Truncheon
- Blunted Javelin
- Szeth's Truncheon
- Blunted Arrow
Using any of the following on Truncheons decreases the time needed to knock out thralls:
Those items can even be used on tools like ![]() Stone Hatchet or weapons to achieve knock-outs.
Stone Hatchet or weapons to achieve knock-outs.
Interacting with one of the following items on them makes it possible to drag them, on foot or horseback:
Place them into one of these building (via interaction):
It is possible to swim, but not to climb, or to use a two-handed weapon while dragging a Thrall. Using either options will unequip the bindings and drop the thrall where it was when performing said action. Gruel, or most food, must be placed inside the Wheel of Pain to act as "fuel". Thralls remain unconscious for 10 minutes inside any player's render range when not bound to any kind of bindings - longer when no player is in render range.
Thrall crafting time
Thrall crafting time, or the speed at which thralls can be produced, is affected by the level of the thrall itself as well as the level of a Taskmaster assigned to the ![]() Wheel of Pain. The type of Wheel of Pain has no effect on crafting times; nor does Food type.
Wheel of Pain. The type of Wheel of Pain has no effect on crafting times; nor does Food type.
| No Taskmaster | T1 Taskmaster
+50% |
T2 Taskmaster
+100% |
T3 Taskmaster
+150% |
T4 (named) Taskmaster
+200% |
Purge Taskmaster
+300% | |
|---|---|---|---|---|---|---|
| Tier 1 | 3,900s (1h05m0s) | 2,600s (0h43m20s) | 1950s (0h32m30s) | 1,560s (0h26m00s) | 1,300s (0h21m40s) | 975s (0h16m15s) |
| Tier 2 | 11,905s (3h18m25s) | 7,937s (2h12m17s) | 5,952s (1h39m12s) | 4,762s (1h19m22s) | 3,968s (1h06m08s) | 2,976s (0h49m36s) |
| Tier 3 | 23,627s (6h33m47s) | 15,744s (4h22m24s) | 11,814s (3h16m54s) | 9,451s (2h37m31s) | 7,876s (2h11m16s) | 5,907s (1h38m27s) |
| Tier 4 (named) | 92,920s (25h48m40s) | 61,946s (17h12m26s) | 46,460s (12h54m20s) | 37,168s (10h19m28s) | 30,973s (8h36m13s) | 23,230s (6h27m10s) |
Deploying
Fighters, Bearers, Archers, and Performers can be placed anywhere that isn't within the claim radius of a different clan or which is prohibited by certain landmarks and zone as determined by the game (e.g. Unnamed City). This means a combat thrall can be placed within a base, or even out in the world. To deploy a combat thrall, move it to the hotbar and place it like any other building item.
Thralls can be useful for defending an area against weak, stupid, or disoriented opponents. They are particularly useful in defending a region against NPCs or against other players during a raid. On PvP servers, it is usually a bad idea to leave a combat thrall out in the open, or anywhere a passing enemy might snipe the thrall with their bow. They will still offer protection when placed inside a building structure.
Combat Thralls will attack other players that come within range, but only during raid times (e.g. 5 pm to 11 pm PST on official servers) (Building damage must be set as Thralls are considered buildings, other wise they won't attack players). This does not apply to Offical PvE/PvC-servers.
Combat Thrall Leveling
Combat thralls (Fighters, Archers, Bearers and Performers) are placed as level zero and can be leveled to 20 maximum. Experience is gained when your character or the thrall makes a kill and varies with the difficulty of the target. Please note experience is only gained when they are actively following you, not while on guard.
At each level gain, points are added to their attributes in a semi-random fashion. Additionally, at levels 10, 15 and 20, the thrall gains a random perk which adds (and sometimes subtracts) to those attributes. A complete list of the pool of perks can be seen at Follower Perks. Crafting thralls need no leveling; they are immediately ready to be placed into the appropriate equipment.
To view the progress of your thrall and determine the effect of feeding on attribute increase probability, use the Stats option (i) by long-pressing the interact key on the targeted thrall.
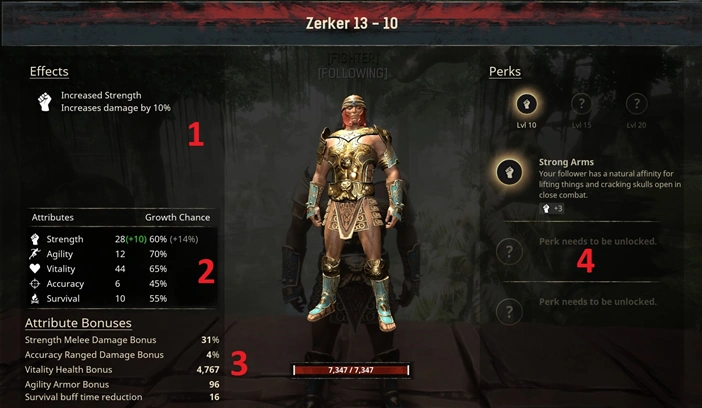
1. The Effects area shows what buffs and debuffs are on the follower at the present time. Each effect will have a unique icon and description.
2. The Attributes show the current level for each attribute in the left column, any additional bonuses due to armor, weapon or buffs in green adds to the value; red subtracts. The second column shows the weighted percentage that, upon leveling, a point will be added to the base stat. The number of added points is random, but seem to average around 5 per level. In this case, the thrall has been fed gruel which increases the probability of getting each point to strength when attaining a new level.
3. The Attribute Bonuses area shows the result of the follower's current stats. Be aware there are hidden multipliers to strength and accuracy that do not change with level. These values are unique to individual followers.
4. Perks are gained when the follower reaches levels 10, 15 and 20. There are quite a few that are available, subject to random selection along with other constraints. This Cimmerian Berserker gained +3 to strength with Strong Arms and added to the armor strength bonus of +7 shows in the Attributes section in green as (+10).
Newly placed thralls are relatively weak and require support from you and, if possible, good armor and weapons to survive. At higher levels, their ability to withstand damage increases and appropriate leveling areas may include the Jungle or Unnamed City to increase experience. At high levels, their ability to withstand damage will exceed yours and make them fine tanks with agro control. Similarly, ranged-leveled thralls, appropriately placed, provide excellent defense for your base.
Feeding
Thralls don't have to be fed, as they depend on a decay timer. If you do not login in 168 hours they will disappear.[citation needed] They will consume preferred food in their inventory for healing when wounded.
Thralls can not die from hunger and will not lose any HP due to lack of food over any period of time.[1]
The foods shown in their inventory screen provide an increased chance to gain various stat points upon leveling; as well as a  Strength buff, visible on their health bar. Usually visible during combat. You can also see their buff on the information screen.
Attribute Growth Chance Buffs and Food Healing
- Feeding thralls specific foods give an increased chance to specific attributes when they gain a level.
- Regeneration per second lasts for 10 seconds per piece. HPS = healpoints per second in the chart below.
- Important note: The current release as of March, 2020 seems to have introduced a visual-only healing indication with online play; single play seems unaffected. The intent with the December, 2019 release was implemented with healing rates that increased depending on the type of food used, but now appear flat at 5 HPS as shown on the thrall's Information page. However, online, the healing rates increase from 1 to 10 HPS from top to bottom in the list below.
| Thrall Preferred Food | Strength | Agility | Vitality | Accuracy | Survival | Nutrition |
|---|---|---|---|---|---|---|
| +7% | +7% | 1 HPS | ||||
| +14% | 1 HPS | |||||
| +14% | 2 HPS | |||||
| +14% | 3 HPS | |||||
| 4 HPS | ||||||
| +14% | 6 HPS | |||||
| +7% | +7% | 7 HPS | ||||
| Lasting Meal | +7% | +7% | 8 HPS | |||
| +7% | +7% | 9 HPS | ||||
| +7% | +7% | 10 HPS |
- Roasted Haunch appears to give no buff to the attribute Survival, as was intended and noted in the devkit.
- Gruel also gives a 10% Strength buff while Cooked Pork Rinds provides a 25% Strength buff. These are stack-able, provides a combined 35% Strength boost.
- This is considered to be a (potentially visible only) bug that is on the low priority list.
Thrall Management
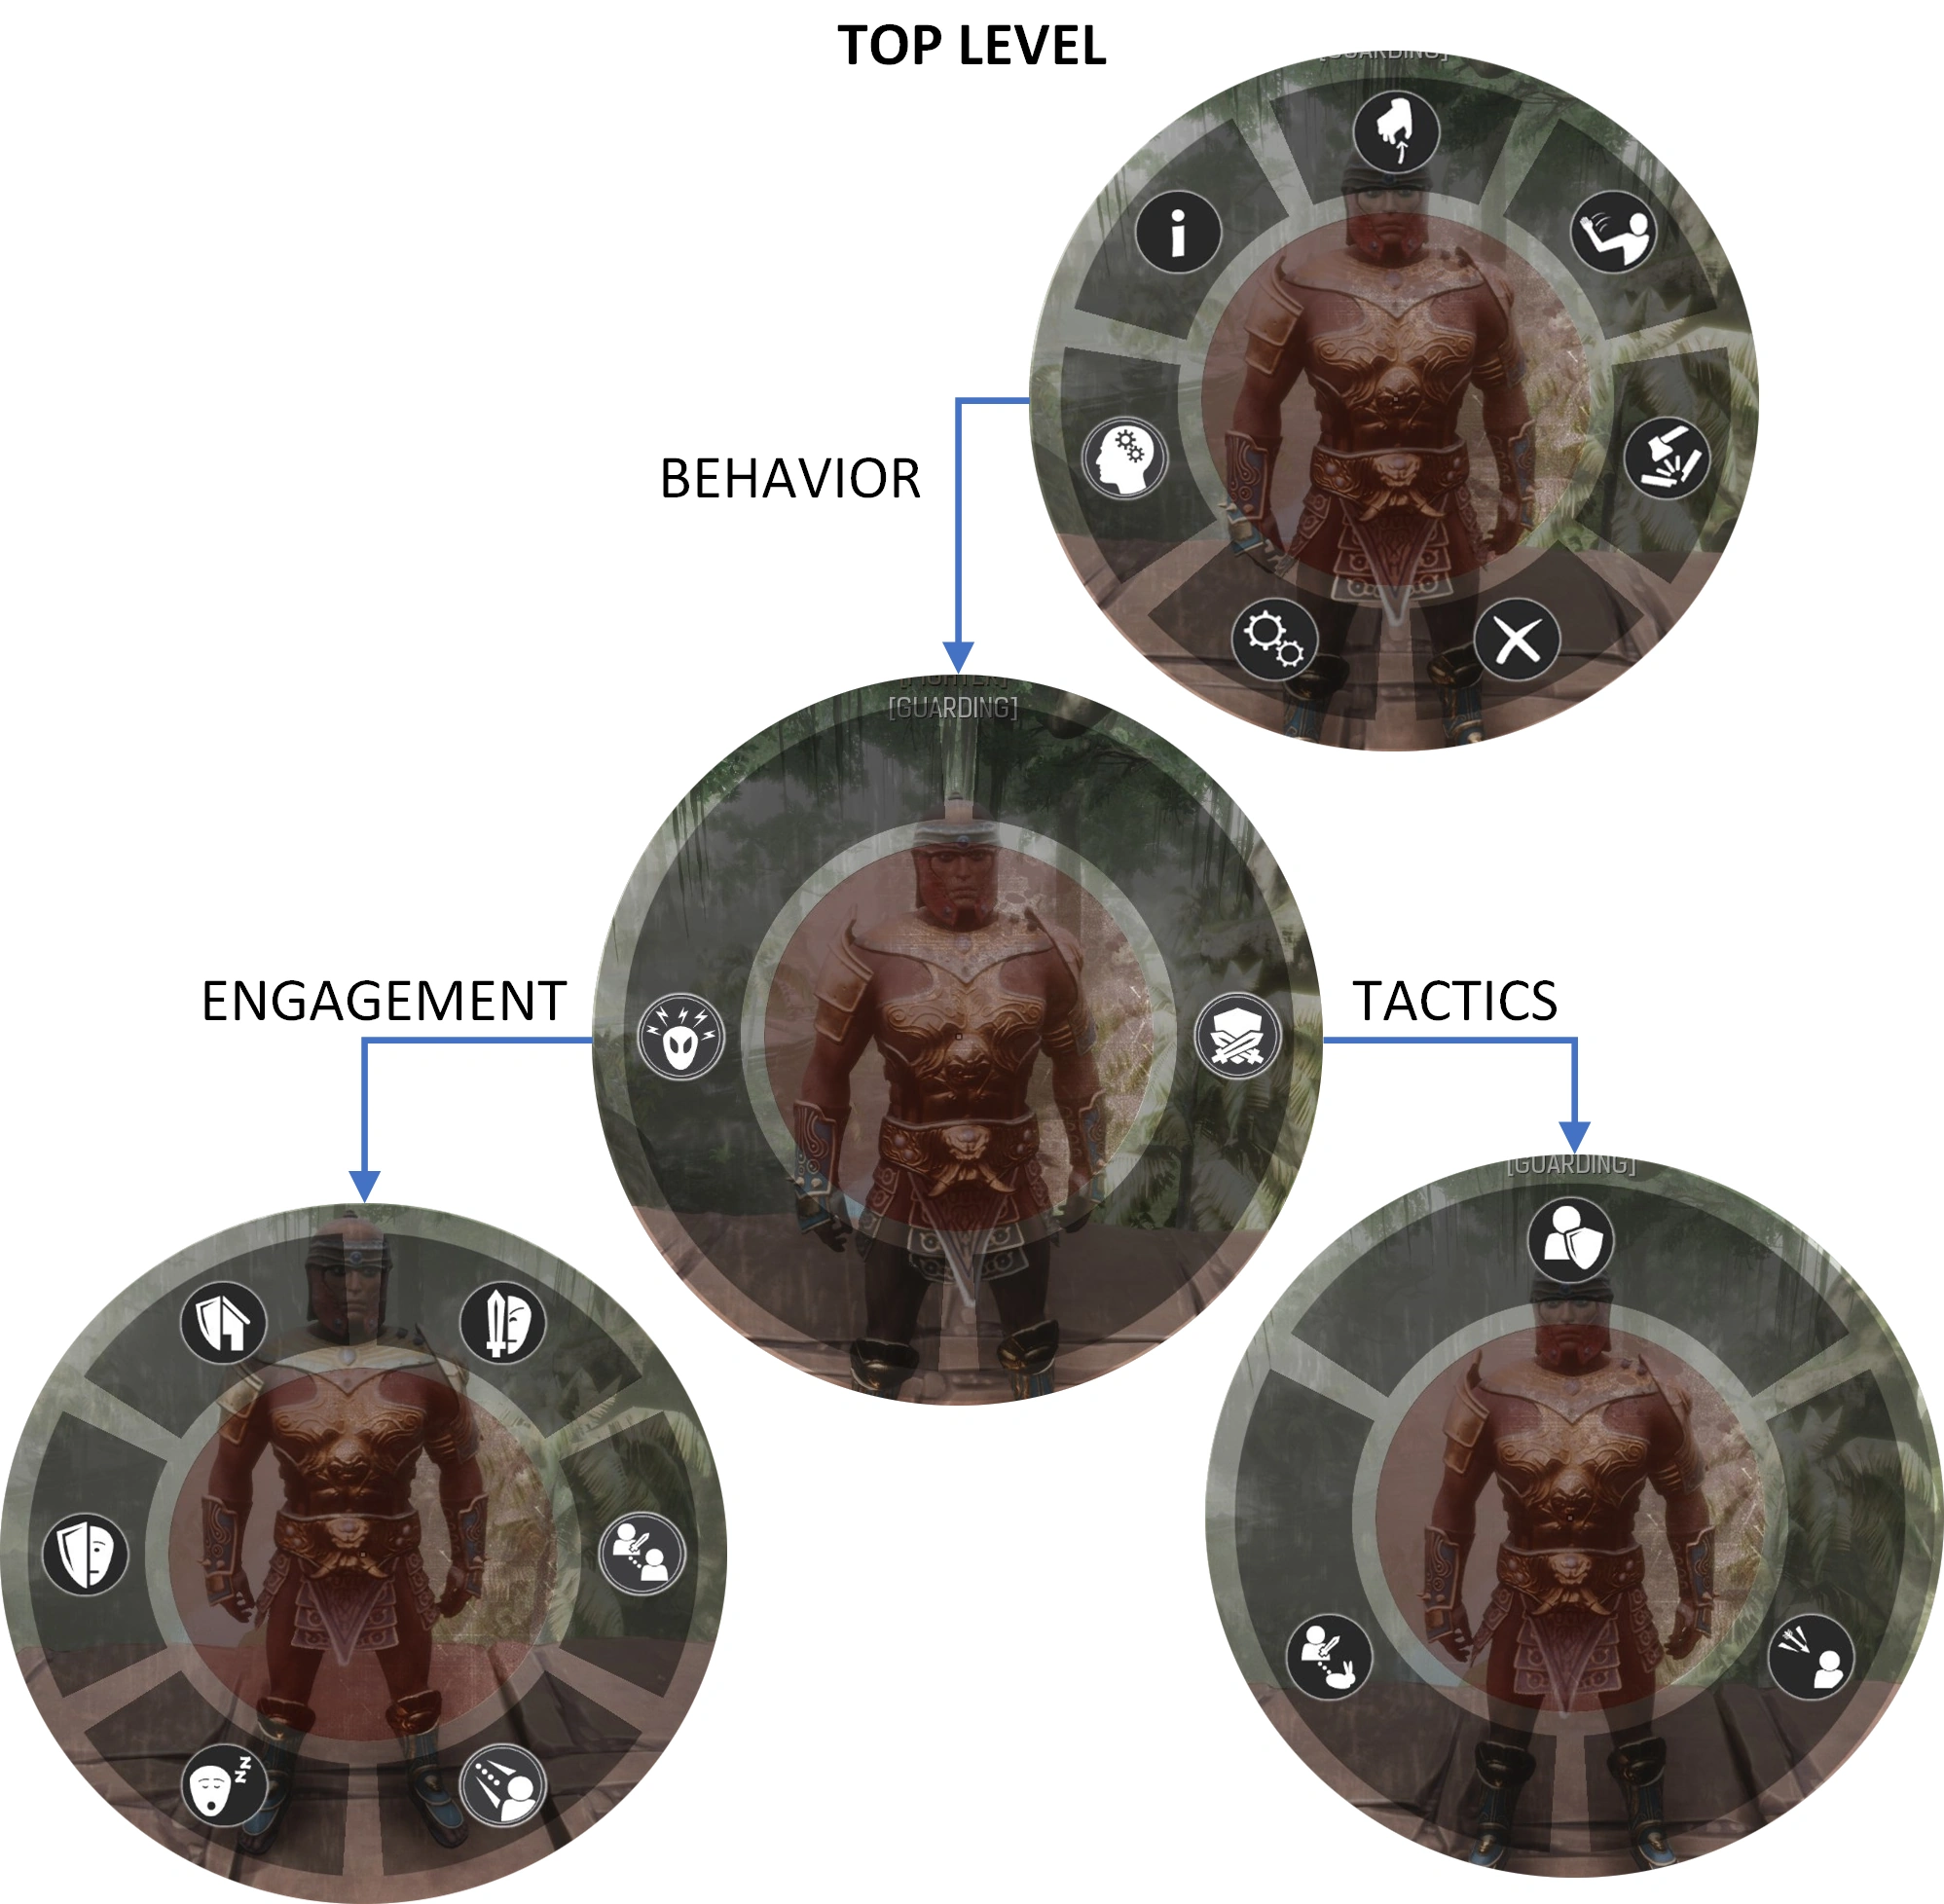

At the top level, this is what you get when you long-press the interact key while targeting your thrall, leading to submenus that set behaviors. These controls persist through logout and server reset. Currently, there is no way to determine where those various controls are set, but we remain hopeful for a future release.
Several items on the wheel are self-evident, such as guard, follow or stop following, cancel. This section will delve into Behavior along with others. You may find the command Stop Following extremely versatile and useful. Break Bond will send the thrall to a peaceful valley, never to be seen again. Their equipment and inventory contents will appear in a loot bag where they stood.
The pair of gears in the lower left opens his inventory, but that can be done with a single interact click.
Tactics

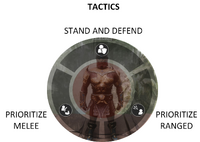
Of the first selection, Tactics is the simplest and has three options:
- Stand and Defend allows the thrall to select the weapon of choice based on the range to the target. If the thrall has a bow and a melee weapon and the target is far enough away, they will select the bow; if close, they will pull out an in-your-face weapon. The thrall will not move, but switch to a melee weapon when the enemy gets close.
- Selecting Prioritize Melee, the thrall will run towards the opponent.
- If Prioritize Ranged is chosen, they will back away to keep the range.
- While not well known, there is a minimum distance for ranged weapons; closer than that and the damage falls off drastically.
Engagement
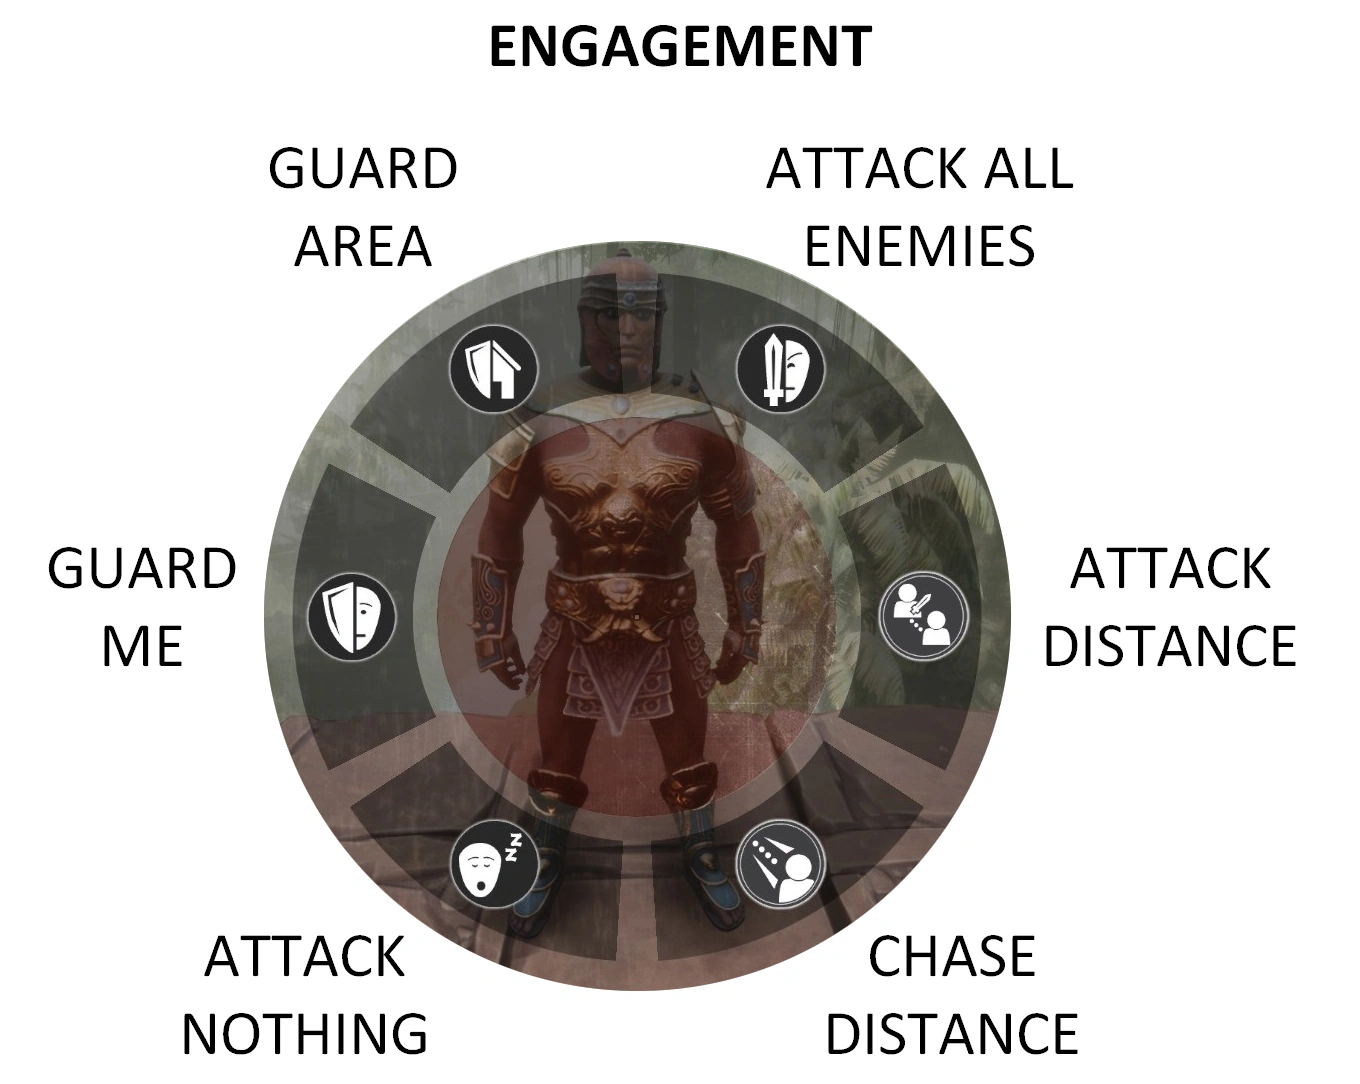
Engagement has several key selections and can be fine-tuned for the situation. Thralls on guard will want different selections than those following. Thralls can be set to guard or attack and the ranges allow fine tuning.
- Guard Me makes you the center of the guard area.
- Guard Area makes the thrall the center.
- Attack All Enemies will make the thrall aggressive to anything within its attack range.
- Attack and Chase Distance define the radius of a circle and are covered below.
- Attack Nothing is taken literally and is a welcome addition for entertainers; just stand there, we will handle it. Be aware they will not defend themselves.
The selections are situational but you can find a combination that fits your playstyle and vary it, or not, leaving it preset for any location or fight. There are a few things to stay aware of, though:
- Attack All Enemies is good for guarding, not so much for following, depending on the surroundings. If trying to single out and draw targets one or two at a time, this selection will bring more than you anticipated. This can be quite interesting in Sepermeru.
- While following, Guard Me is a good choice since the thrall will attack the target(s) that are on you. Guard Area may draw in more enemies if they are in range. Similarly, Attack All Enemies is dangerous since the thrall can bring 3 more to your party of 3, leaving you in a pool of blood.
- On guard, however, Attack All Enemies is a good choice, as is Guard Area since you want the thrall to engage anything that gets within range. Guard me is ineffective since you may be at the other end of the base.
Attack and Chase Distance
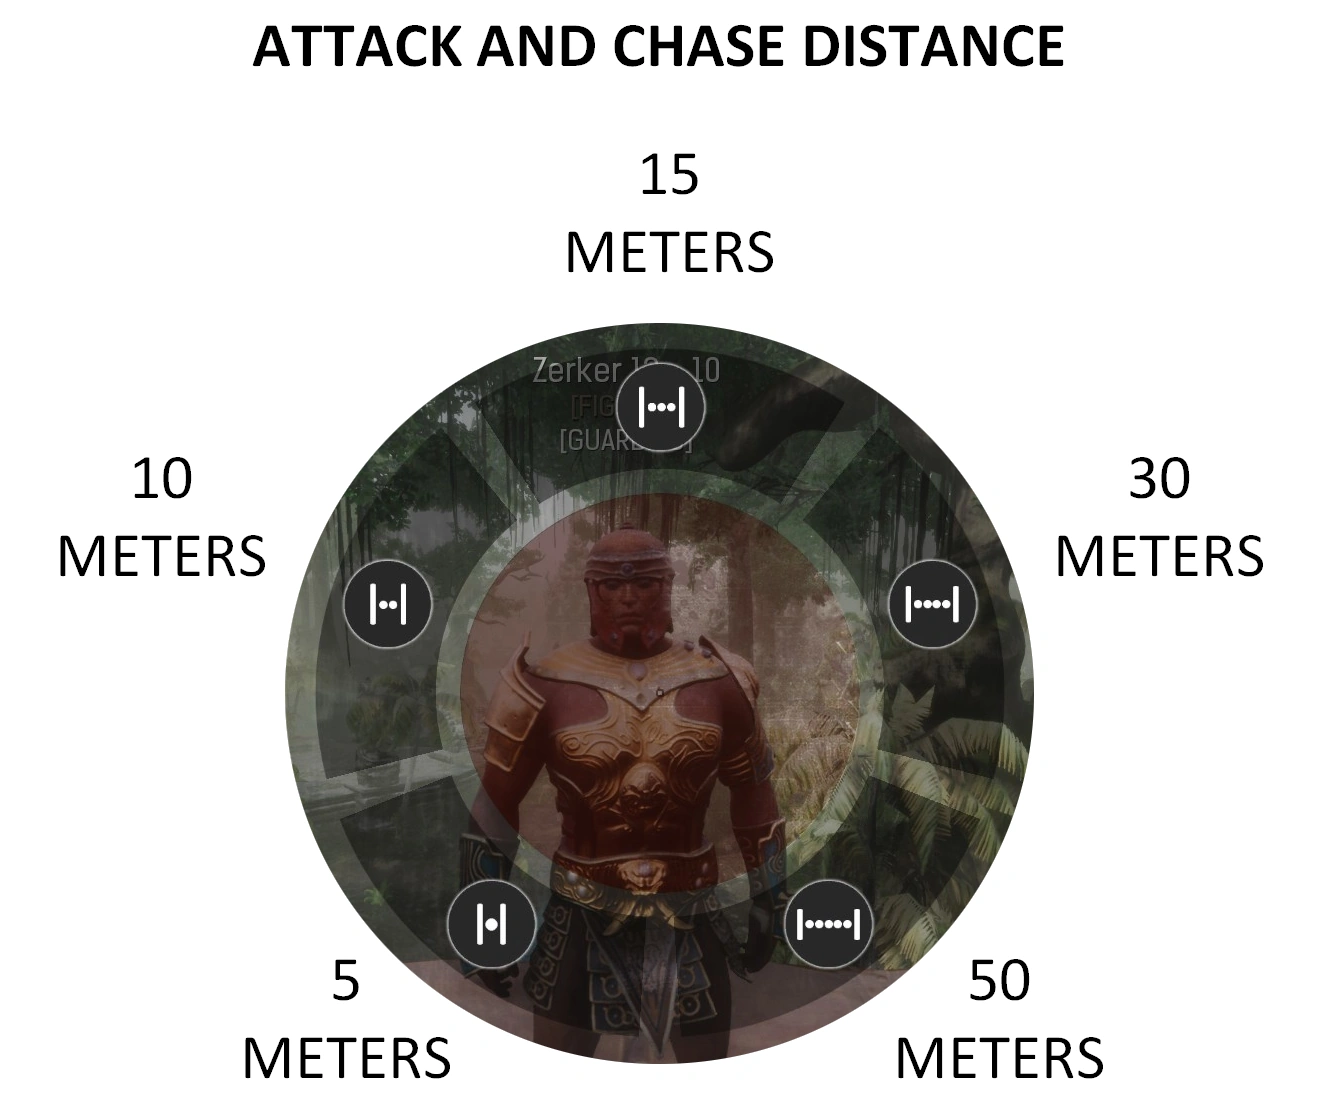
Setting the above up, the last two allow you to fine tune the guard and attack area. The scales are the same; the effects are quite different.
- Attack applies to the initial engagement and any enemy that wanders into, say, 15 meters, will get their clock cleaned. No bunnies were harmed in testing this.
- Chase is how far your guard will continue to attack a fleeing enemy.
While more important on guard, this also affects a following companion. You really do not want your thrall to go running off and leave you partnerless. Similarly, running through the Unnamed City a thrall that runs off to attack something that is of no use to you is, well, useless. Play with the distances and find where you want each one for your playstyle.
Combat
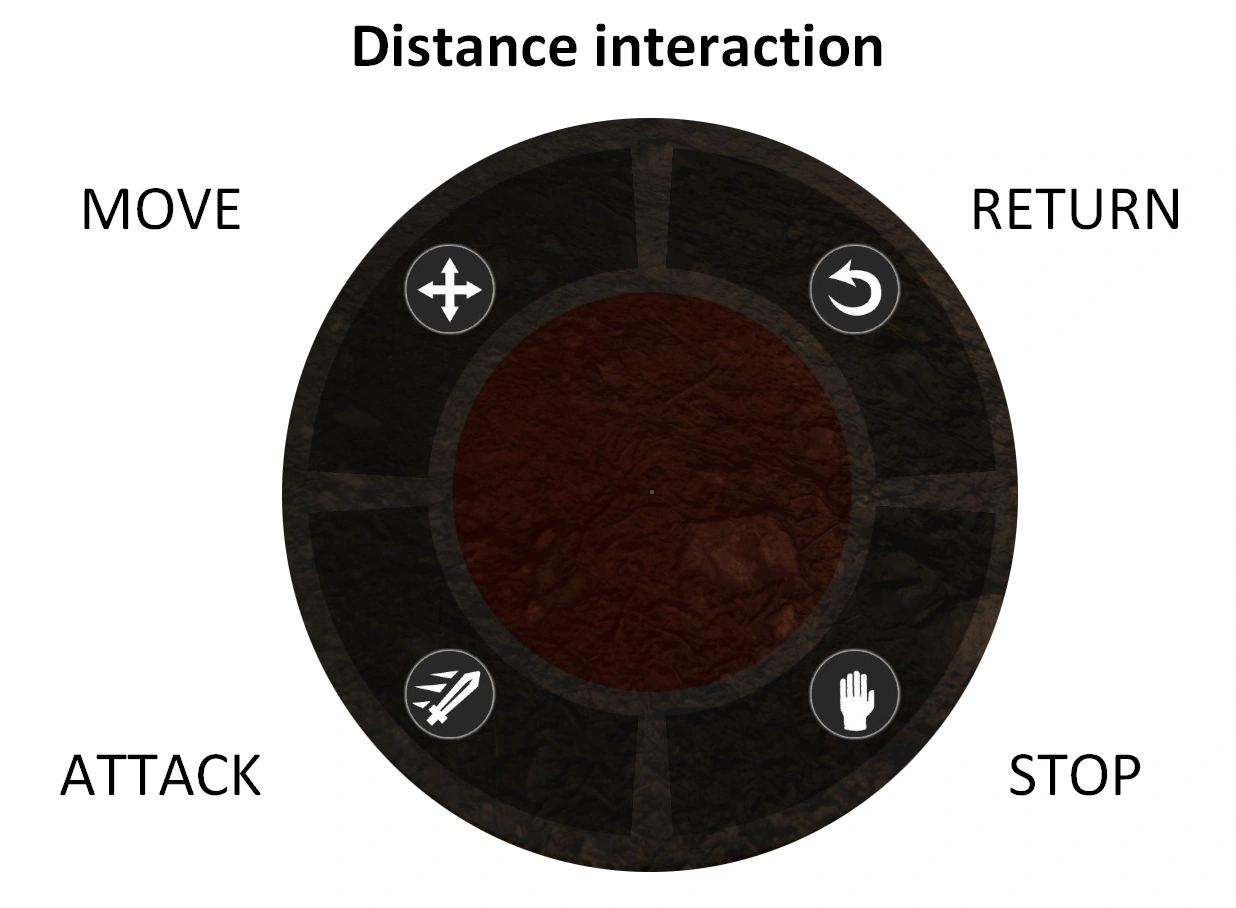
So, that’s setup, but what about while in combat? We now have plenty of options to control the thrall’s attention.
With an active thrall, you have the option to long-press the interact key and control their immediate behavior. Caution is advised to avoid using this and the single press option in bushes or too close to keep from picking up greens or a rock instead of issuing a command.
- Move will command the thrall to move to the targeted location. If it is too far away from you, they will return to your location. If in combat, they will also return to the enemy, but it’s still a good way to bring the enemy to you, especially with others close-by that you do not want to agro yet.
- Attack will send your thrall after the target, whether an enemy or a docile critter, like a deer. You must be within a certain range for this command to be effective.
- Return tells the thrall to return to you. The same conditions apply as with Move; they will immediately return to combat.
- Stop is dangerous since the thrall takes you literally. Not only will the thrall stop where he is, but he will not defend himself. You must ‘turn him on’ again to fight.
Shortcuts are available and welcome if you have a pack on you!
- Singleclick to move if nothing is targeted; attack if something is targeted.
- Doubleclick to stop; repeat doubleclick to resume.
- Tripleclick to tell your thrall to return to you.
Stop Following is one of the best adds to the follower system and adds a level of control in previously unavailable areas. You can command your thrall to Stop Following in almost any place. Simply command your thrall to Follow to return to the previous state.
- Thralls do not get experience for kills while not following
- They will not return to their last guard spot unless:
- You die.
- You log out.
- You leave the general area for some period of time.
Under these conditions, the thrall goes into Scouting Mode and will return to their last guard spot after approximately 15 minutes of inactivity.
Stop following is useful in a number of situations, most notably visiting another clan's area (ever been blocked in a doorway?). Sepermeru also comes to mind, as does conversational NPCs.
For other tips and tricks with Stop Following, see https://forums.funcom.com/t/tricks-with-stop-following/133758.
Specializations
Thralls have a variety of specializations. Most can be visually identified from a distance by what they are holding, e.g. bow is an archer, sword and shield is a fighter. Thralls placed at a crafting station reduce the amount of crafting materials needed, reduce fuel consumption or crafting speed and often provide unique or high-grade recipes.
Subsequent additions of Crafting stations, such as the Fermentation Barrel and the Saddler's Worktable allow placement of some professions with their accompanied bonuses. Visit the various profession or thrall page to see which profession can be useful in a particular Crafting station. As an example:
- Artisan Table specific profession usage, crafting bonuses and recipes are shown on the Artisan Table page.
| Specialization | Use | Appearance |
|---|---|---|
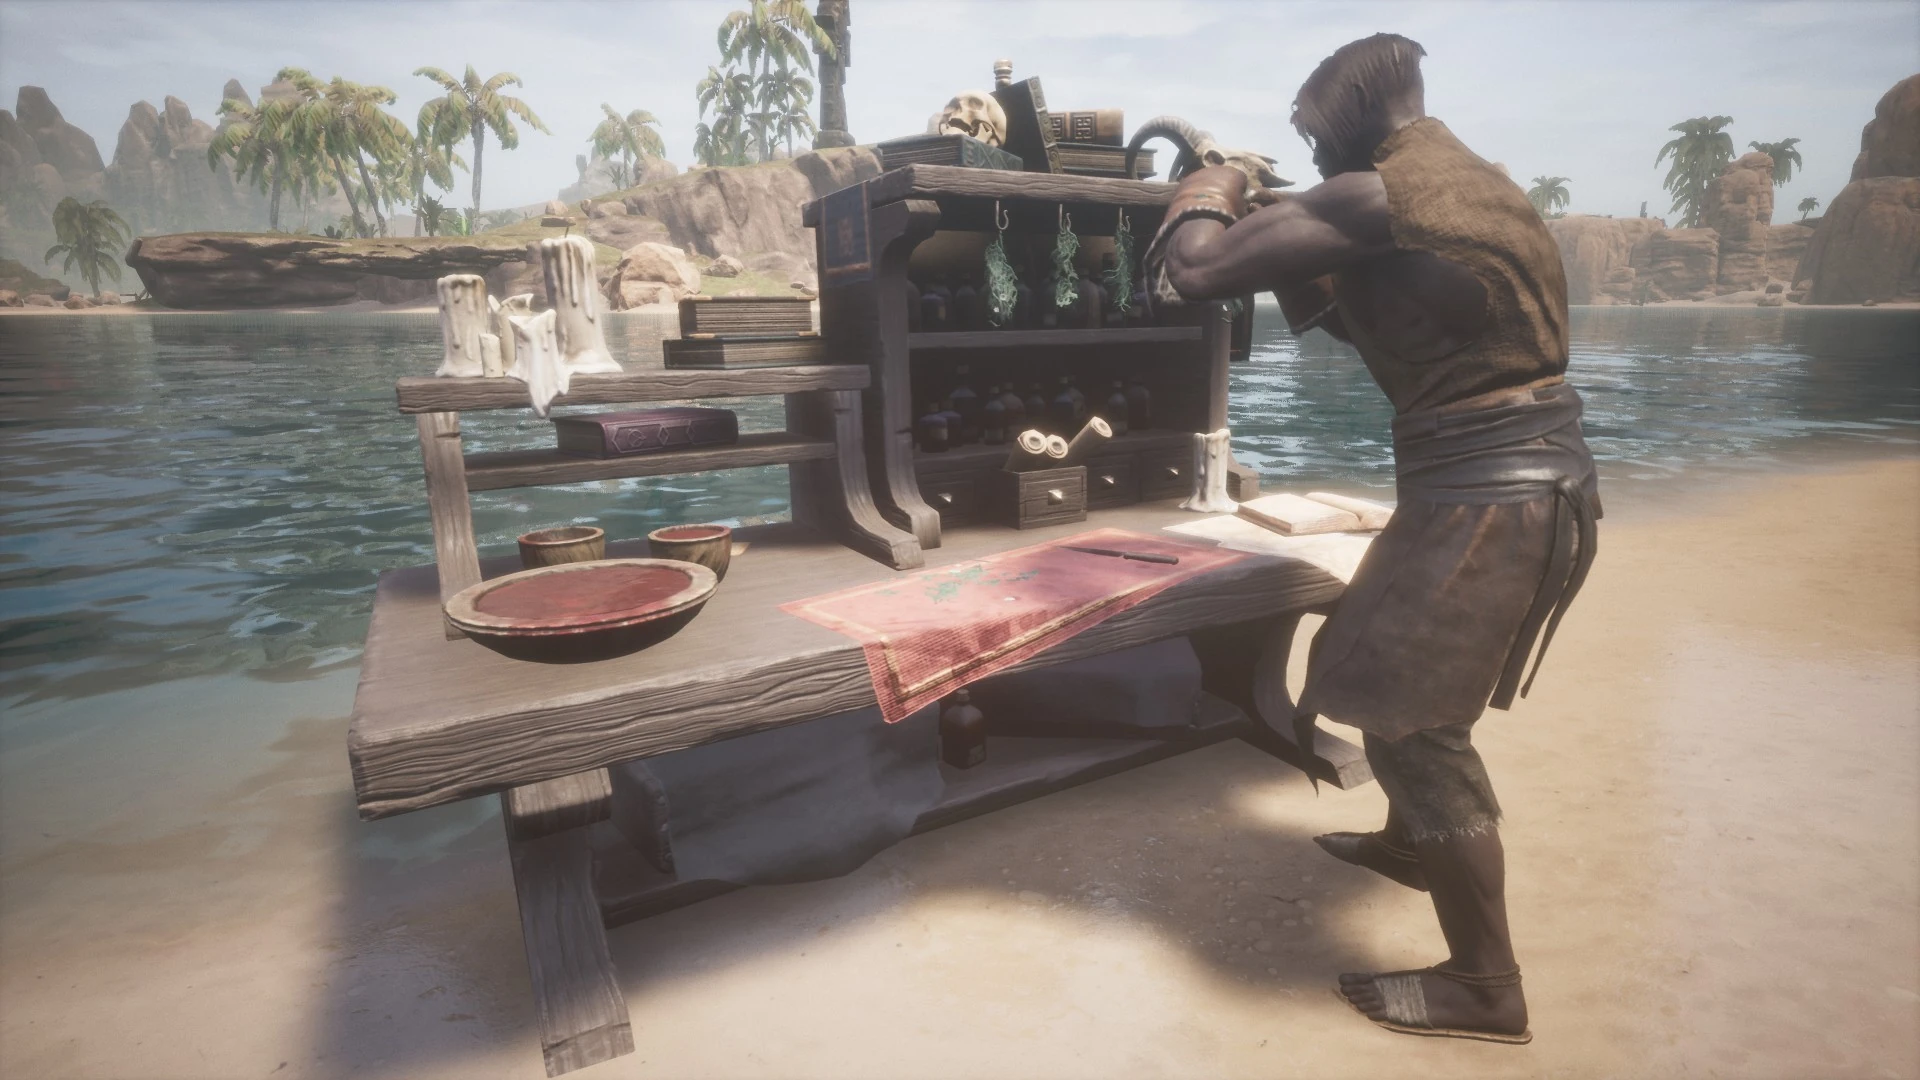
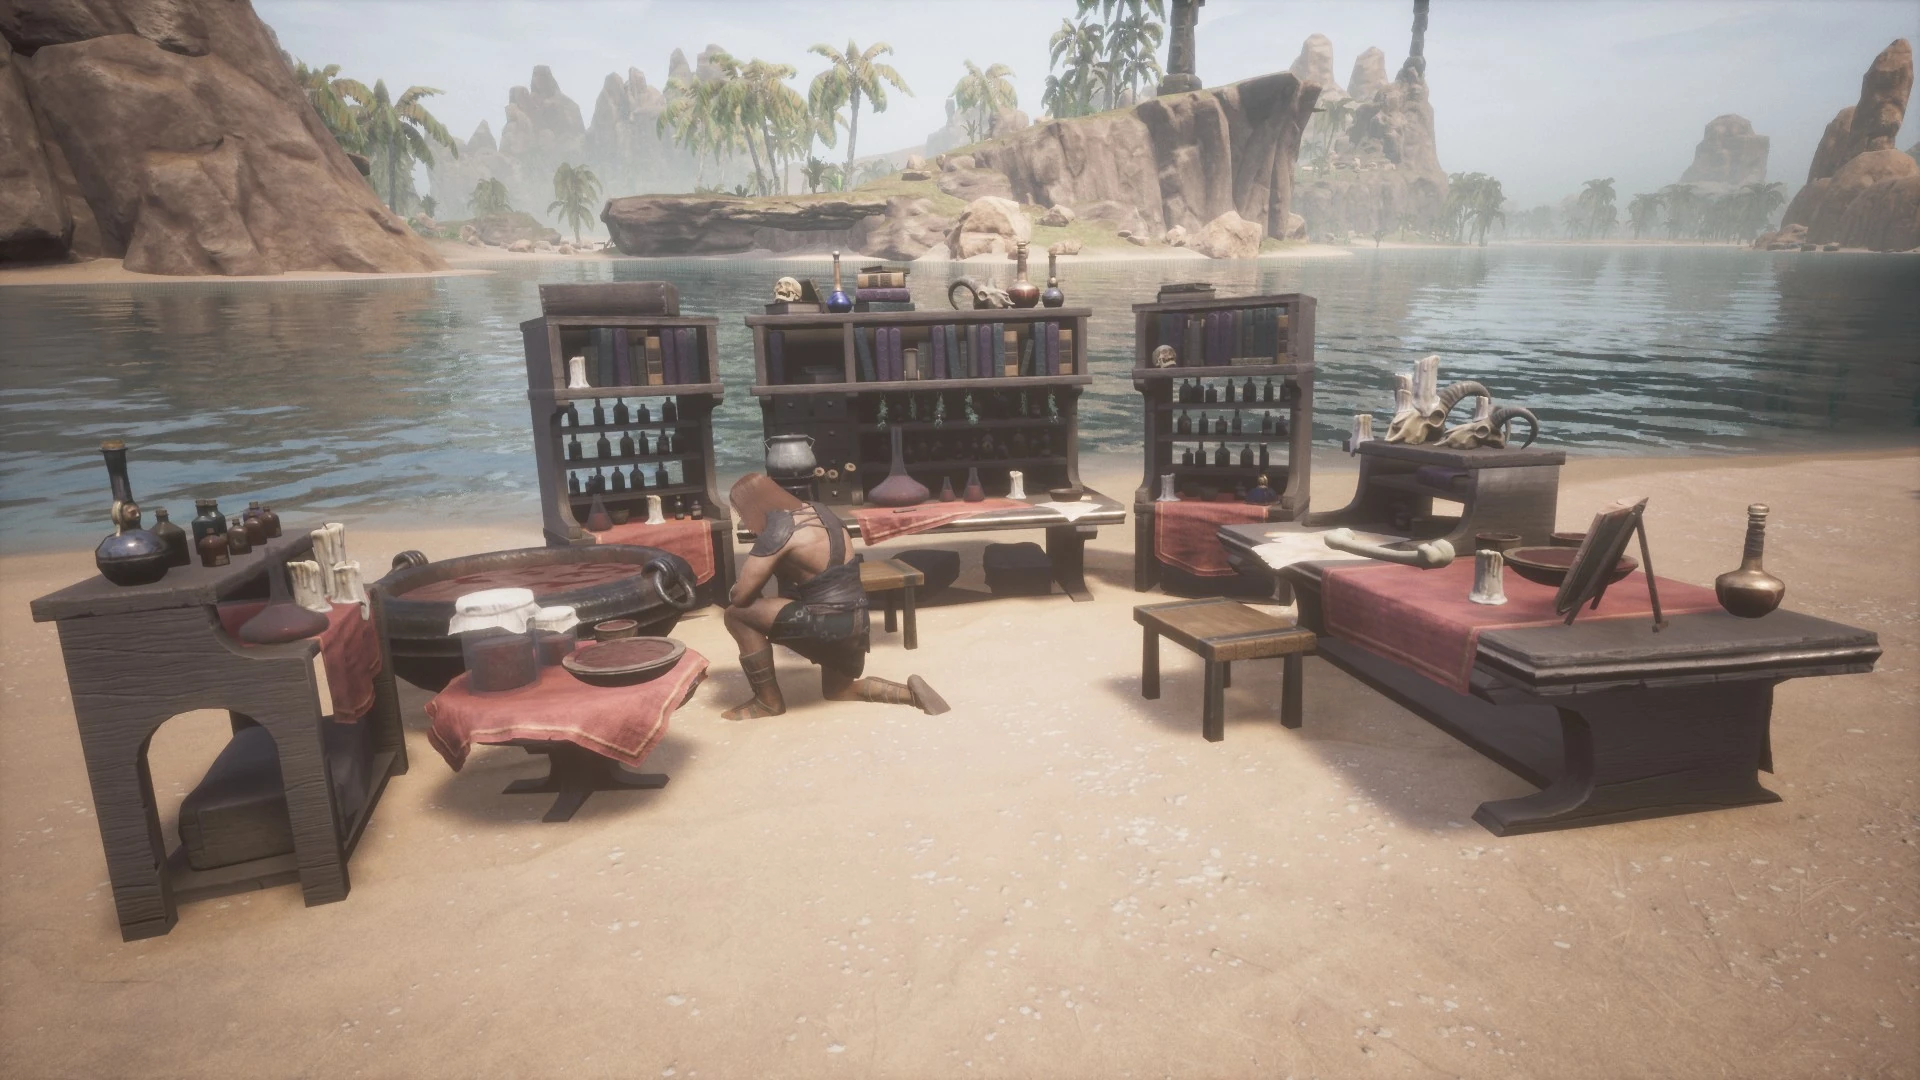
| Alchemist | Place at Cauldron. Provides orb receipes | Wields a stone mace |
| Archer | Guards areas, companion | Wields a bow |
| Armorer | Place at an Armorer's Bench or Artisan Table | Wields a Repair Hammer |
| Bearer | Guards areas, has increased inventory, companion | Wears a Bearer Pack |
| Blacksmith | Place at a Blacksmith's Bench or Artisan Table | Wields a Repair Hammer |
| Carpenter | Place at a Carpenter's Bench or Artisan Table | Wields a Repair Hammer |
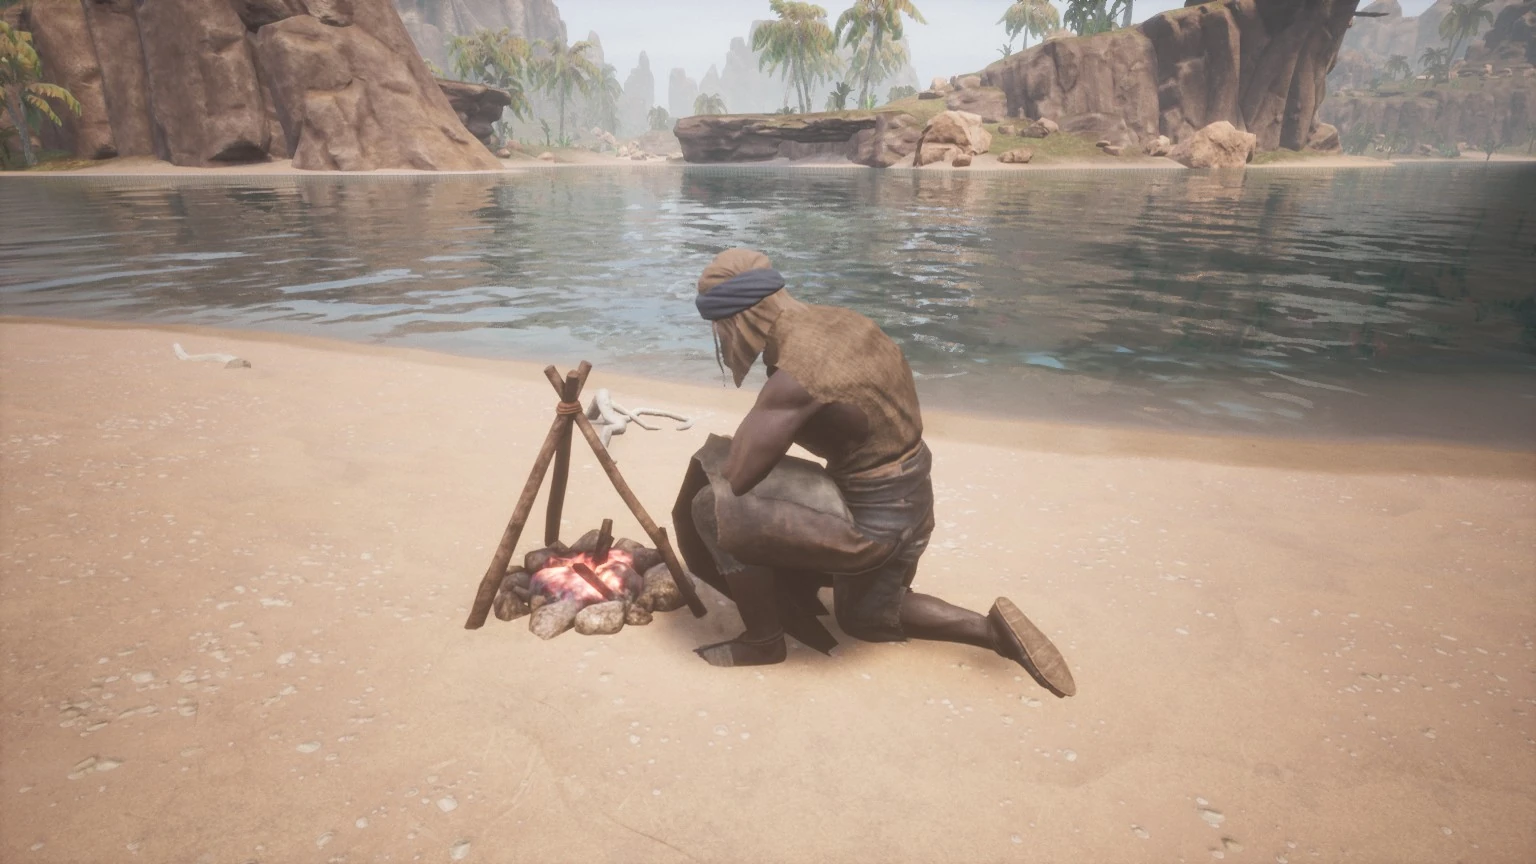
| Cook | Place at a Campfire or Bonfire | Wields Daggers |
| Entertainer | Removes corruption and provides a health regen buff | Wields Daggers |
| Fighter | Guards areas, companion | Wields a weapon or sometimes is unarmed |
| Priest - Derketo | Place at a Pleasure Place of Derketo | Wears an Acolyte Headpiece |
| Priest - Jhebbal Sag | Place at a Bower of Jhebbal Sag | Wears Hyena Skull Helmet and Hyena Skins |
| Priest - Mitra | Place at a Shrine of Mitra | Dressed in blue and found at a Mitran altar |
| Priest - Set | Place at a Sepulcher of Set | Wears a Stygian mask |
| Priest - Ymir | Place at an Altar to Ymir | Wears Nordheimer Fur Armor |
| Priest - Yog | Place at a Pit of Yog | Wields a Jawbone sword |
| Smelter | Place at a Furnace or Artisan Table | Wears mitts |
| Tanner | Place at a Tannery or Artisan Table | Wields a large cleaver |
| Taskmaster (Slaver) | Place at a Wheel of Pain or Torturer's Worktable | Wields a Truncheon and Fiber Bindings |
Tiers
Every specialization has 4 different levels, or tiers, identified with a I, II, or III at the end of their name, with tier 4 thralls being uniquely named. The exceptions are priests (Priest, High Priest and Archpriest) and Taskmasters from Sepermeru (Journeyman, Apprentice, Master).
Thralls affect crafting speeds, resource requirements and fuel usage when placed at a workstation, depending on their specialization and tier.
Tier 3 and 4 Thralls, when placed at their corresponding workstations, can grant access to additional crafting recipes or exceptional/flawless variants of equipment.
For example:
- A Carpenter II placed at a Carpenter's Bench makes it possible to craft Shaped Wood for 7 Wood instead of 10.
- A Blacksmith II placed at a Blacksmith's Bench makes it possible to craft Iron Reinforcements for 1 Iron Bar
- An Armorer III placed at an Armorer's Bench makes it possible to craft exceptional armor pieces.
Archer and Fighter thralls will have more health and armor based on their tier. Damage is based on the weapon they use and their corresponding attribute, Accuracy or Strength. Note that with the December, 2019 update, Archers may have higher Strength than Accuracy; Fighters may have higher Accuracy than Strength.
Named thralls (tier 4)
Tier 4 thralls have unique names. Crafting thralls often provide additional recipes when placed at a crafting station.
The thralls listed below include the in-game map coordinates where they can spawn.
- See Coordinates for how to view coordinates in-game.
- Alternatively, see Admin Panel for an easy way to view or copy your current location to paste elsewhere.
- Additionally, where possible, visiting a unique thrall's page will include a Map link for visual indications of potential spawn points. Purge-only thralls will never have a fixed spawn point.
Named Thralls by Profession
All Combat Thralls
| Name
Console ID |
Type | HLTH | STR | AG | VIT | ACC | SUR | STR
Mult |
ACC
Mult |
Locations |
|---|
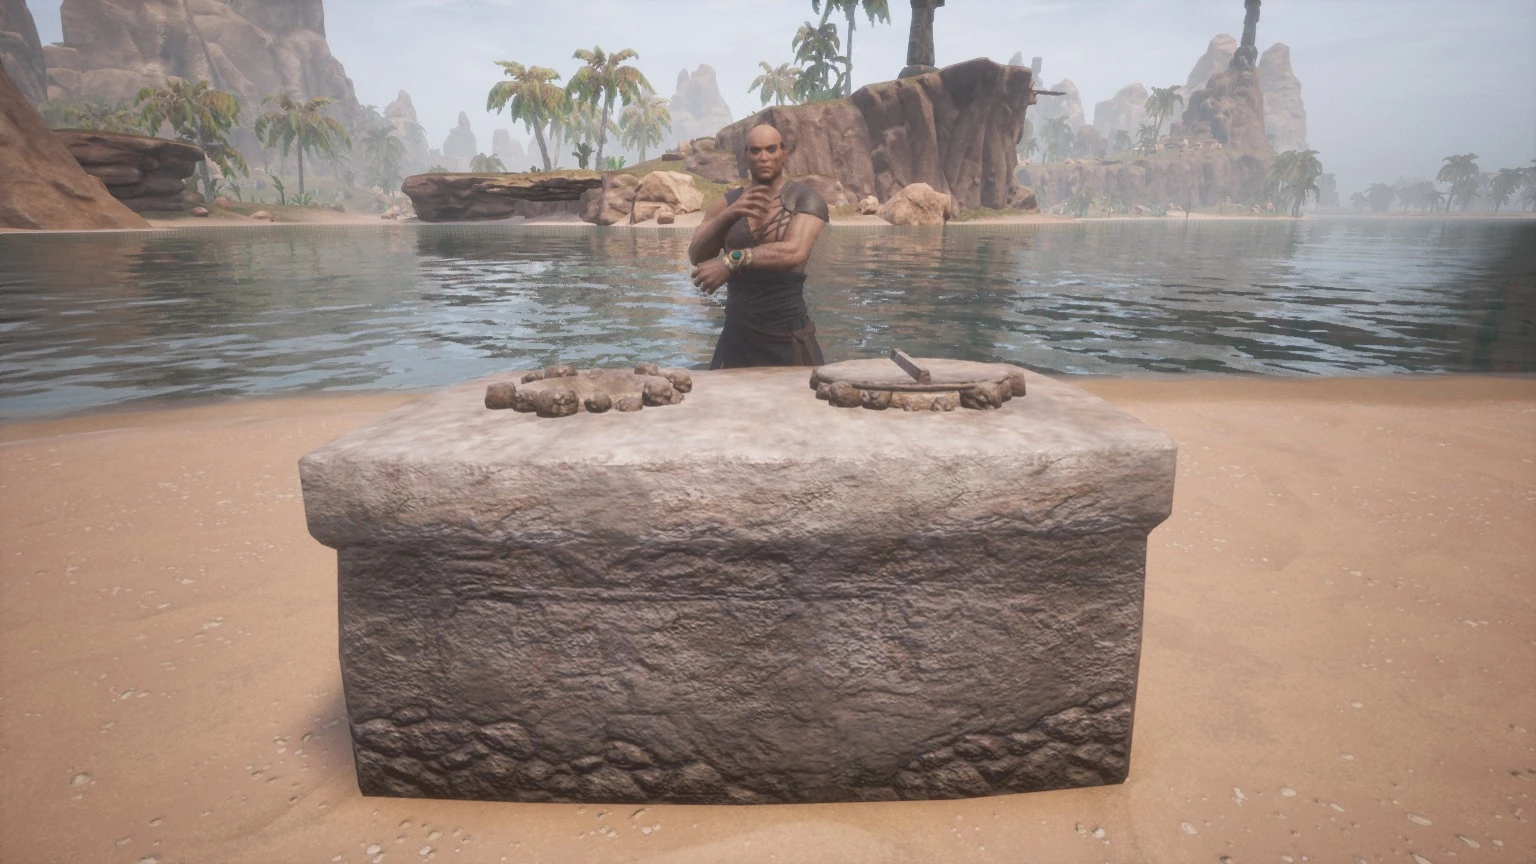
Alchemists
Description
An Thrall can be placed in the Thrall slot of the ![]() Firebowl Cauldron,
Firebowl Cauldron, ![]() Improved Firebowl Cauldron,
Improved Firebowl Cauldron, ![]() Precision Firebowl Cauldron,
Precision Firebowl Cauldron, ![]() Giant's Firebowl Cauldron,
Giant's Firebowl Cauldron, ![]() Dyer's Bench,
Dyer's Bench, ![]() Alchemist's Bench,
Alchemist's Bench, ![]() Improved Alchemist's Bench,
Improved Alchemist's Bench, ![]() Trade Alchemist's Bench,
Trade Alchemist's Bench, ![]() Precision Alchemist's Bench and
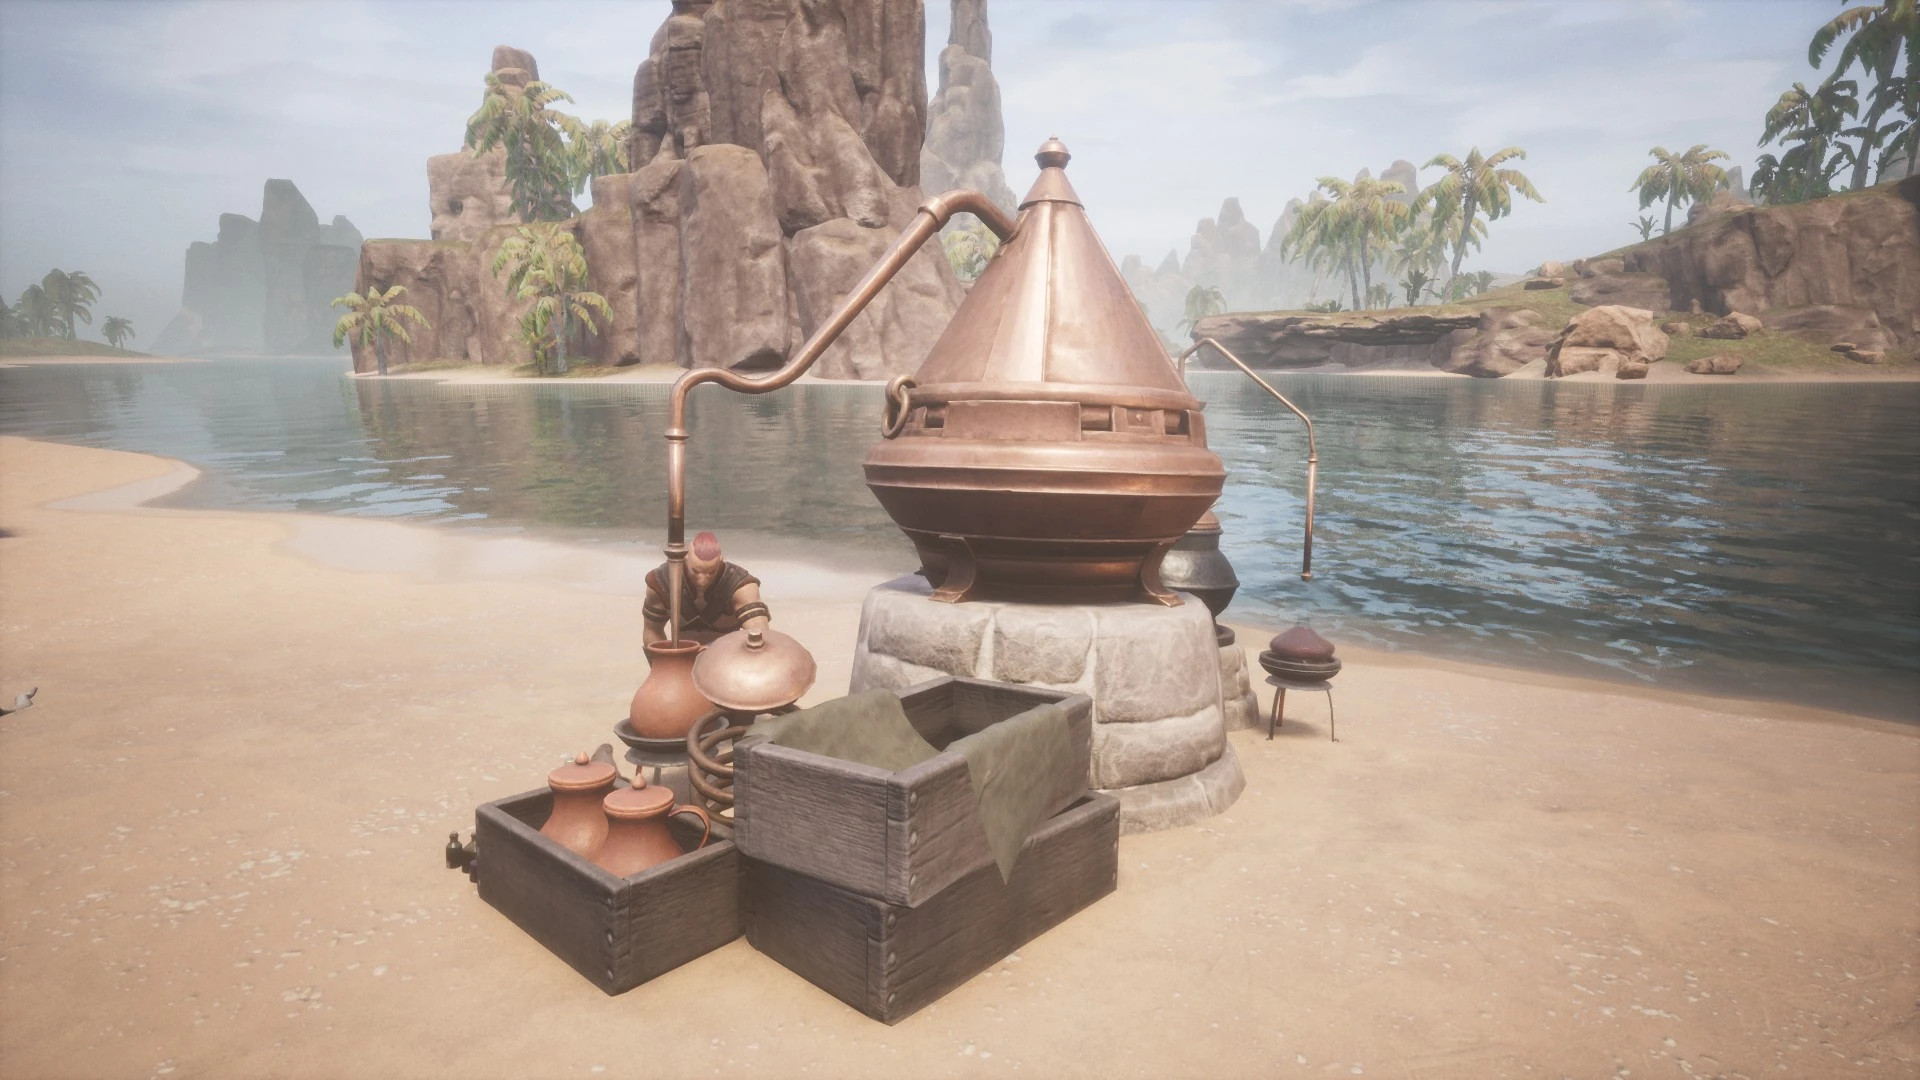
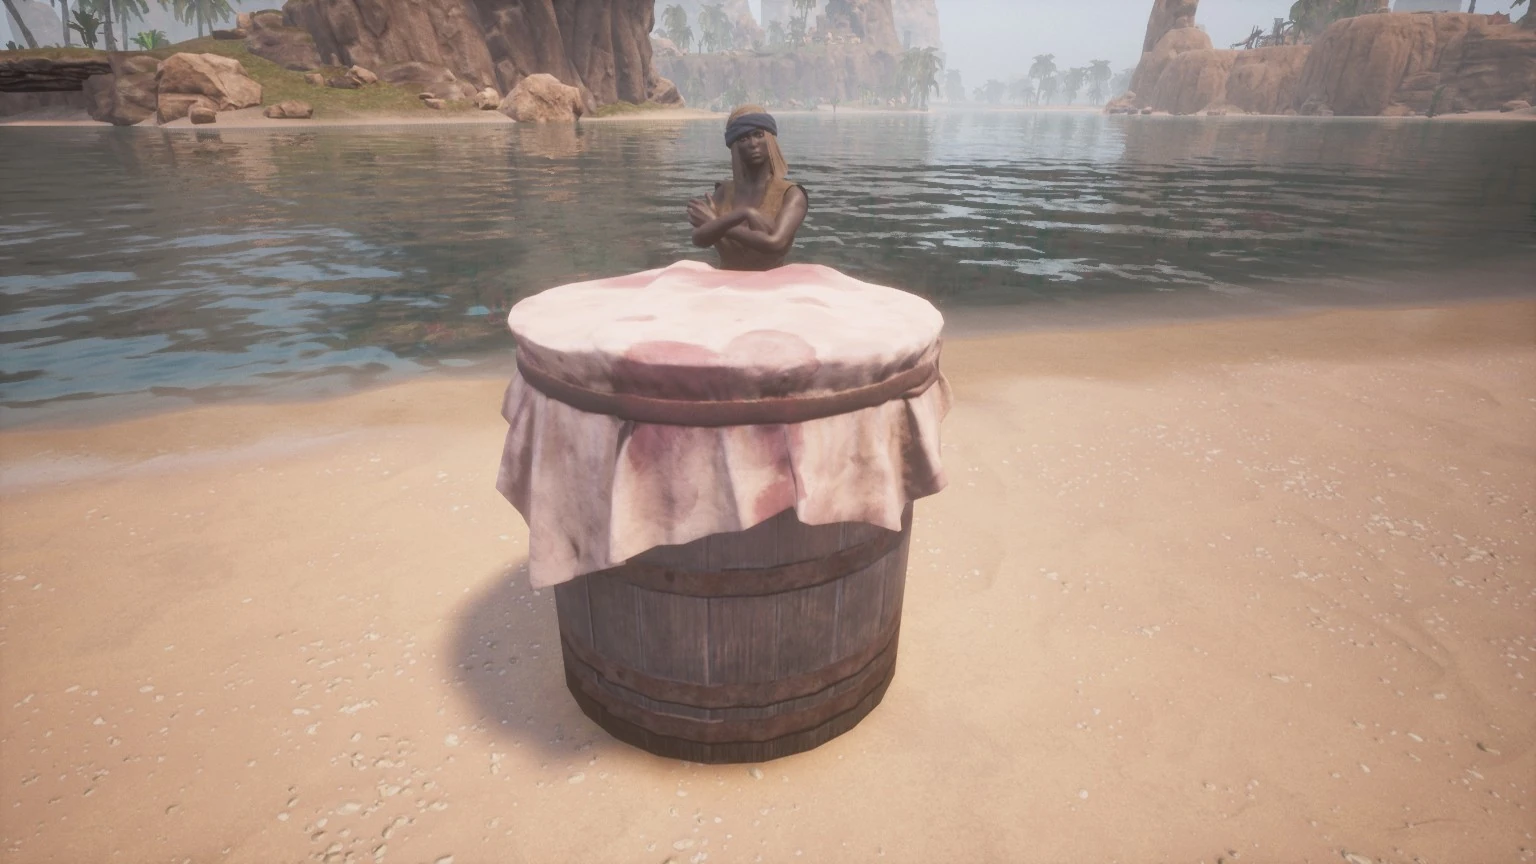
Precision Alchemist's Bench and ![]() Fermentation Barrel.
Fermentation Barrel.
Benefits
| Bonus | T1 | T2 | T3 | T4 (Named) |
|---|---|---|---|---|
| Crafting Speed | +25% | +50% | +75% | +100% |
Notes
Bonus Recipes
- Any Thrall grants the recipes for Demon-fire Orb, Gaseous Orb, Grease Orb and Fill.
- Any Tier 3 or 4 Thrall grants the recipe for Oil at any alchemist's bench.
- Any Tier 4 Thrall grants the recipes for Spice and two recipes for Tar at any alchemist's bench.
T4 Thralls (named)
- [[]] indicates data are not available or irrelevant. Blank cells indicate zero.
Alchemists
Gallery
Armorers
| Name
Console ID |
Benefits | Faction | Race | Bonus
Recipes |
Locations |
|---|
Bearers
| Name
Console ID |
Benefits | Faction | Race | HLTH | STR | AG | VIT | ACC | SUR | STR
Mult |
ACC
Mult |
Locations |
|---|
Blacksmiths
| Name
Console ID |
Benefits | Faction | Race | Bonus
Recipes |
Locations |
|---|
Carpenters
| Name
Console ID |
Benefits | Faction | Race | Bonus
Recipes |
Locations |
|---|
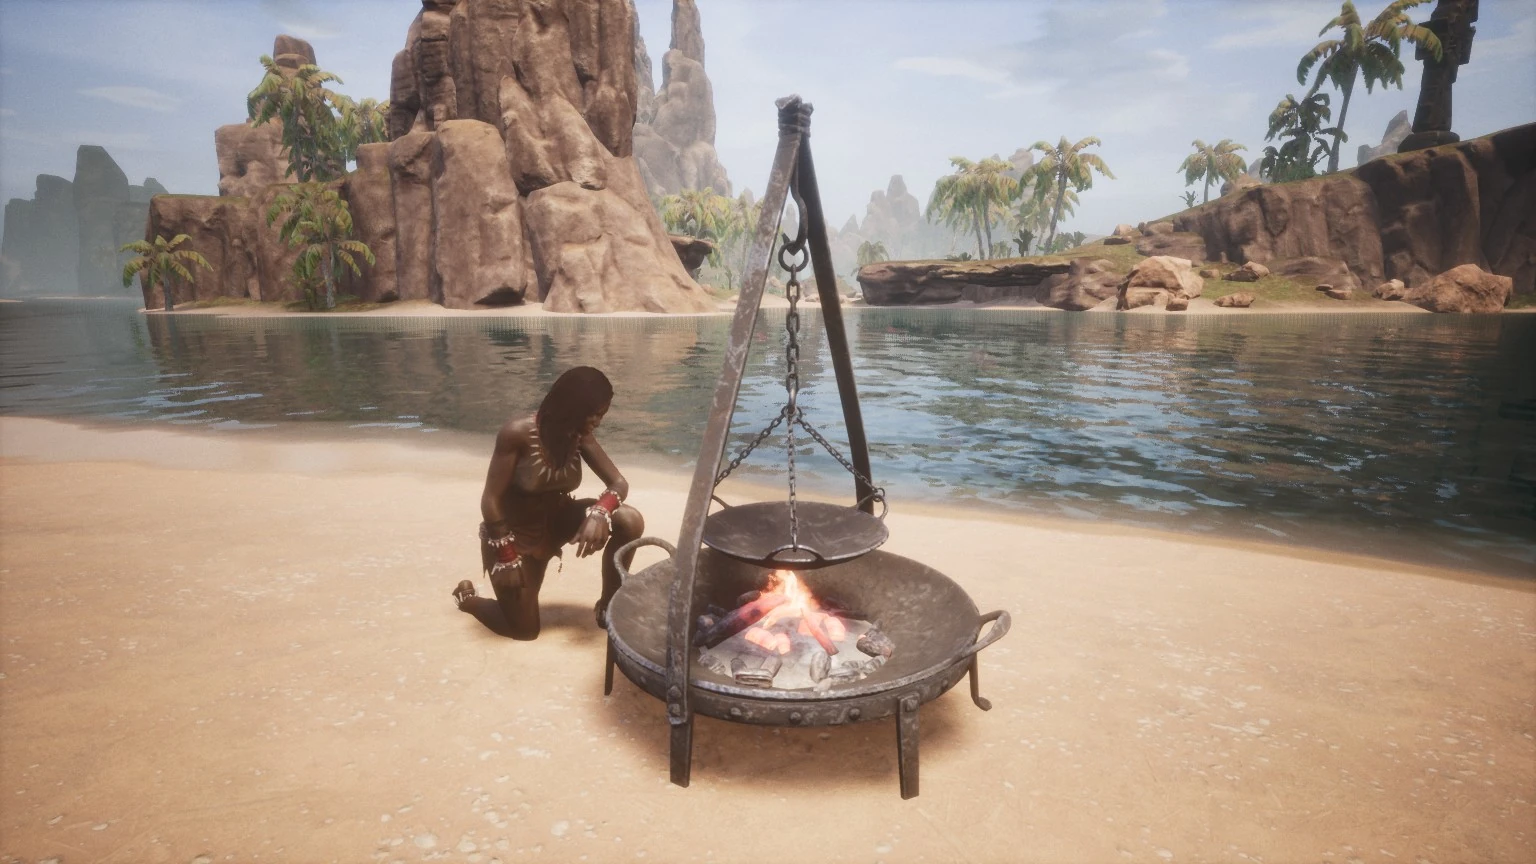
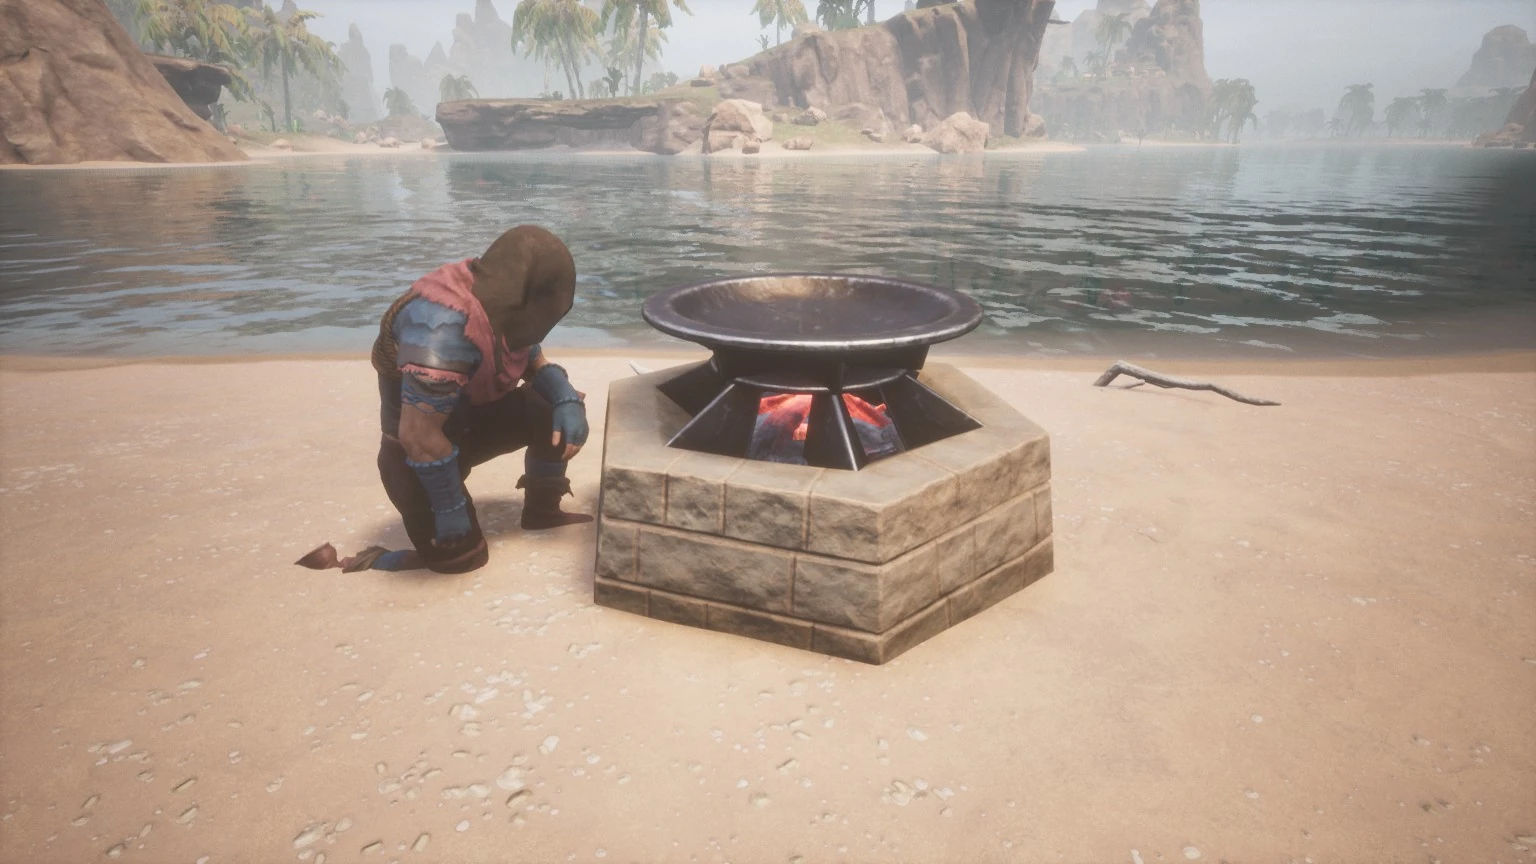
Cooks
Description
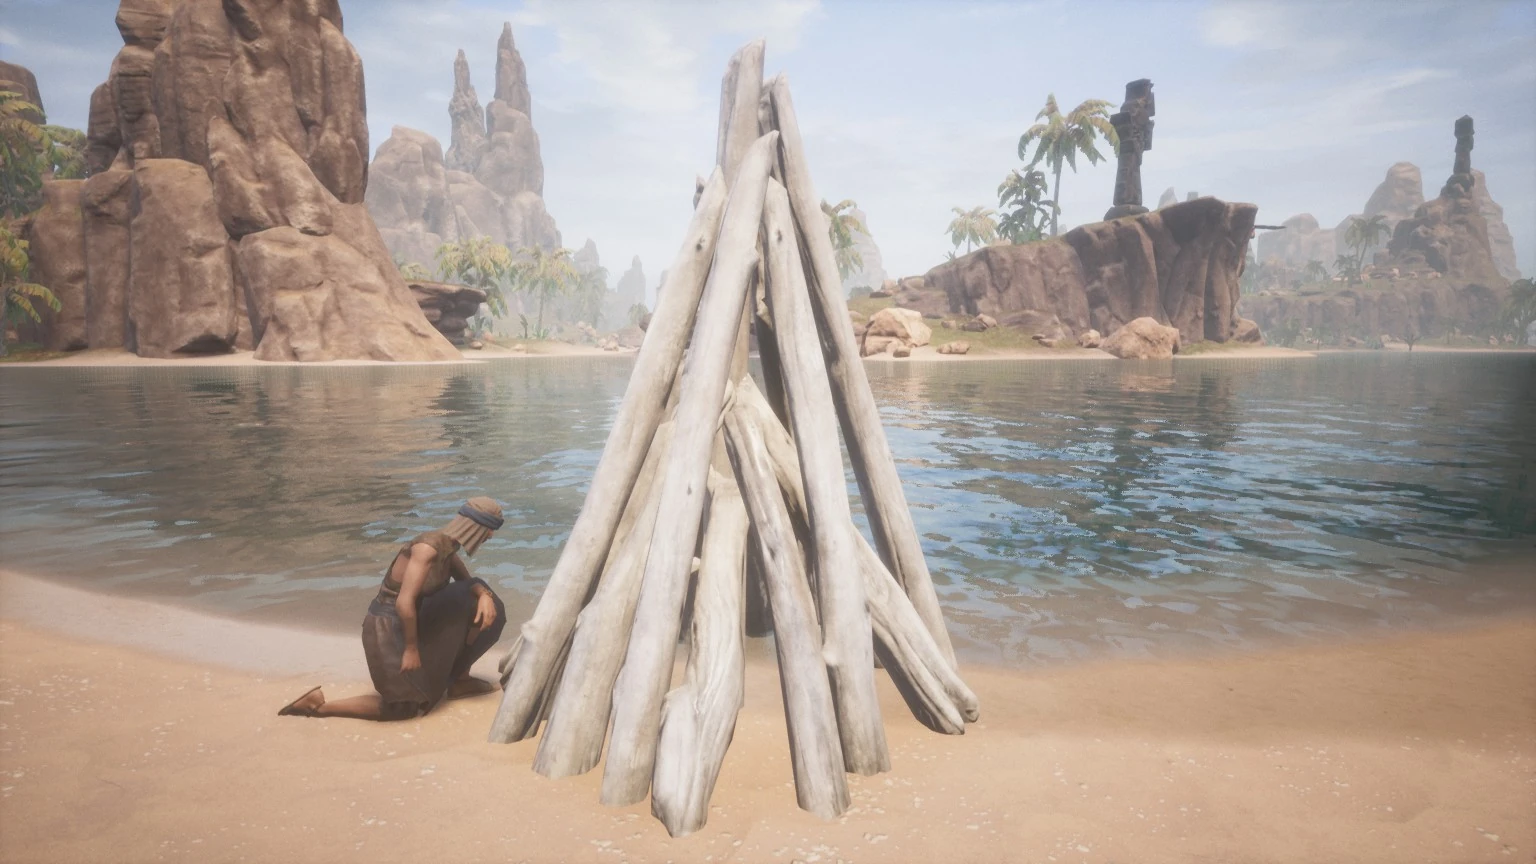
A Cook can be placed in the Thrall slot of the ![]() Campfire,
Campfire, ![]() Large Campfire,
Large Campfire, ![]() Bonfire,
Bonfire, ![]() Stove,
Stove, ![]() Improved Stove and
Improved Stove and ![]() Fermentation Barrel.
Fermentation Barrel.
For increased speed a Cook can also be placed at the ![]() Firebowl Cauldron,
Firebowl Cauldron, ![]() Improved Firebowl Cauldron,
Improved Firebowl Cauldron, ![]() Giant's Firebowl Cauldron and
Giant's Firebowl Cauldron and ![]() Precision Firebowl Cauldron.
Precision Firebowl Cauldron.
Benefits
| Bonus | T1 | T2 | T3 | T4 (Named) |
T4 purge (Named) |
|---|---|---|---|---|---|
| Crafting Speed | +22.5% | +45% | +72.5% | +92% | +138% |
Bonus Recipes
- At any stove, a Cook enables all the recipes (including lower tiers) specified below:
- The Lone Fisherman (only) - Spicy Dried Fish Combo.
- Tier 4 Purge - Bone Broth, Egg Surprise.
- Tier 4 - Honeyglazed Roast.
- Tier 3 - Ice Tea.
- Tier 2 - Honey Jerky, Honeyed Gruel.
- Tier 1 - Honeybread, Honeyed Eggs, Mystery Meat Soup.
- The Lone Fisherman (only) -
- At at a Fermentation Barrel, a Tier 4 Purge Cook enables all the recipes specified below:
- Tier 4 Purge and the Lone Fisherman - Bitter Tea, Frenzywine, Honey Whisky, Pirate Rotgut, Stygian Liquor.
- Tier 4 Purge and the Lone Fisherman -
T4 Thralls (named)
- [[]] indicates data are not available or irrelevant. Blank cells indicate zero.
Cooks
Gallery
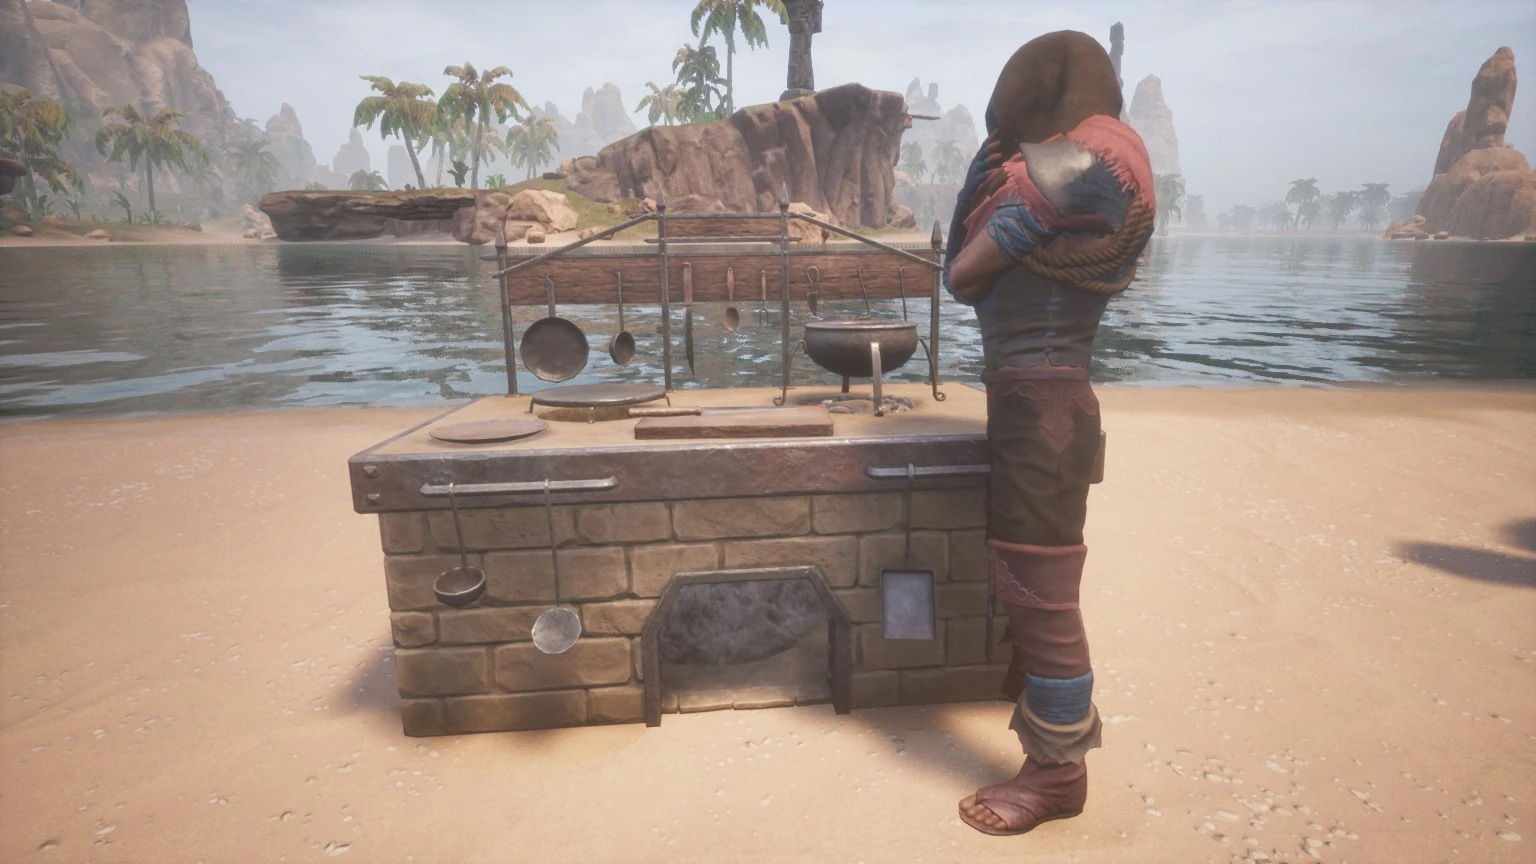
Turas the Cook at a Campfire
The Lone Fisherman at a
Stove

Entertainers
| Name
Console ID |
Benefits | HLTH | STR | AG | VIT | ACC | SUR | STR
Mult |
ACC
Mult |
Locations |
|---|
Priests
| Name
Console ID |
Benefits | Faction | Race | Bonus
Recipes |
Religion | Locations |
|---|
- Tier 3 priests (Archpriests) can also craft the Avatar and perform the Shield Ritual for their particular religion.
Smelters
| Name
Console ID |
Benefits | Faction | Race | Locations |
|---|
Tanners
| Name
Console ID |
Benefits | Faction | Race | Bonus
Recipes |
Locations |
|---|
Taskmasters
| Name Console ID |
Benefits | Faction | Race | Bonus Recipes |
Locations |
|---|
Notes
- Thralls can provide access to unique items. For example, a Stygian thrall allows players to create Stygian weapons even though their character might be from a different race.
- A Nordheimer or Cimmerian Priest can only be placed on an altar of Ymir, a Stygian Priest on an altar of Set, etc.
- Thralls can be used to defend a base. They can also be placed in the wild to attack hostile enemies (ie. posting an archer tower in the North to help clear an area of wolves).
- Drops Human Flesh when killed, with a chance of common loot.
- "Thrall patrols" are a requested feature which is not currently planned.[2]
Non-captive Thralls/NPCs
Merchants
Others